
Facemasks help slow the spread of coronavirus, and are now essential in everyday life – thanks to government rules mandating their use on public transport, in shops and, in some places, schools.
But the classic blue disposable masks you see around are made from plastic – and they’re already littering our streets, rivers and oceans.
Fortunately, there are many ways to create a mask that achieves the same protection using upcycled fabric and other materials you can find at home.
What materials are best for homemade coronavirus facemasks?
Disposable medical masks are made from multiple layers of polypropylene – a kind of plastic. When they’re well-fitted, they protect the wearer from covid-contaminated droplets in the air. They also protect other people, by stopping the wearer’s own breath spreading too far from their face.
But for non-medical situations, a few layers of fairly tightly woven cotton will do the trick. This is because, while only somewhat effective against other people’s droplets, the fabric will still help you keep your coughs and sneezes to yourself – protecting those around you.
The science is now settled: if everyone wears a washable, reusable mask, we’ll all be more protected from coronavirus. This means we can make our own at home using everyday materials, without having to worry about special filters.
We’ll also be saving mountains of single-use plastic pollution, and keeping the important protective materials for medical use.
It’s worth noting that handwashing and keeping two metres apart are still crucial, and that some people are exempt from wearing masks – so give people the benefit of the doubt.
What else should you consider when making your own mask?
A good fit over the nose is important for both effectiveness and comfort (and helps to avoid steamed up glasses). A pleated shape (where the fabric is folded over itself) helps create a better fit, and is fairly easy to do if you have an iron. You could also insert a wire at the top edge to improve the fit (wire bread-bag ties work really well). You can even add a button to stop your glasses sliding down your nose.
It’s a good idea to choose a fabric you love so you’ll be happy to wear it every day. Upcycle an old T-shirt, shirt or tea-towel. You could even tie-dye fabric from an old cotton shirt or pillowcase to get the colours you want.
Choose one fabric for the outer layer and one for the lining. Make sure you test their breathability – and steer clear of super-stretchy fabric if you’re going to sew.
Finally, while earloops are the norm, they aren’t the only way to secure a mask – and can be uncomfortable for some people. Consider using a shoelace or ribbon, that can tie around the back of your head, make T-shirt yarn, or even a very large rubber band (which has the benefit of ‘sticking’ to your hair and keeping the mask up).
Upcycling is a great way to repurpose clothes and other items you have at home – again saving waste from going to landfill.
After a summer of coronavirus mask crafting on lockdown around the world, there are literally thousands of video tutorials for all kinds of upcycled mask-making. Googling what you’re upcycling (eg a T-shirt) is bound to bring up results.
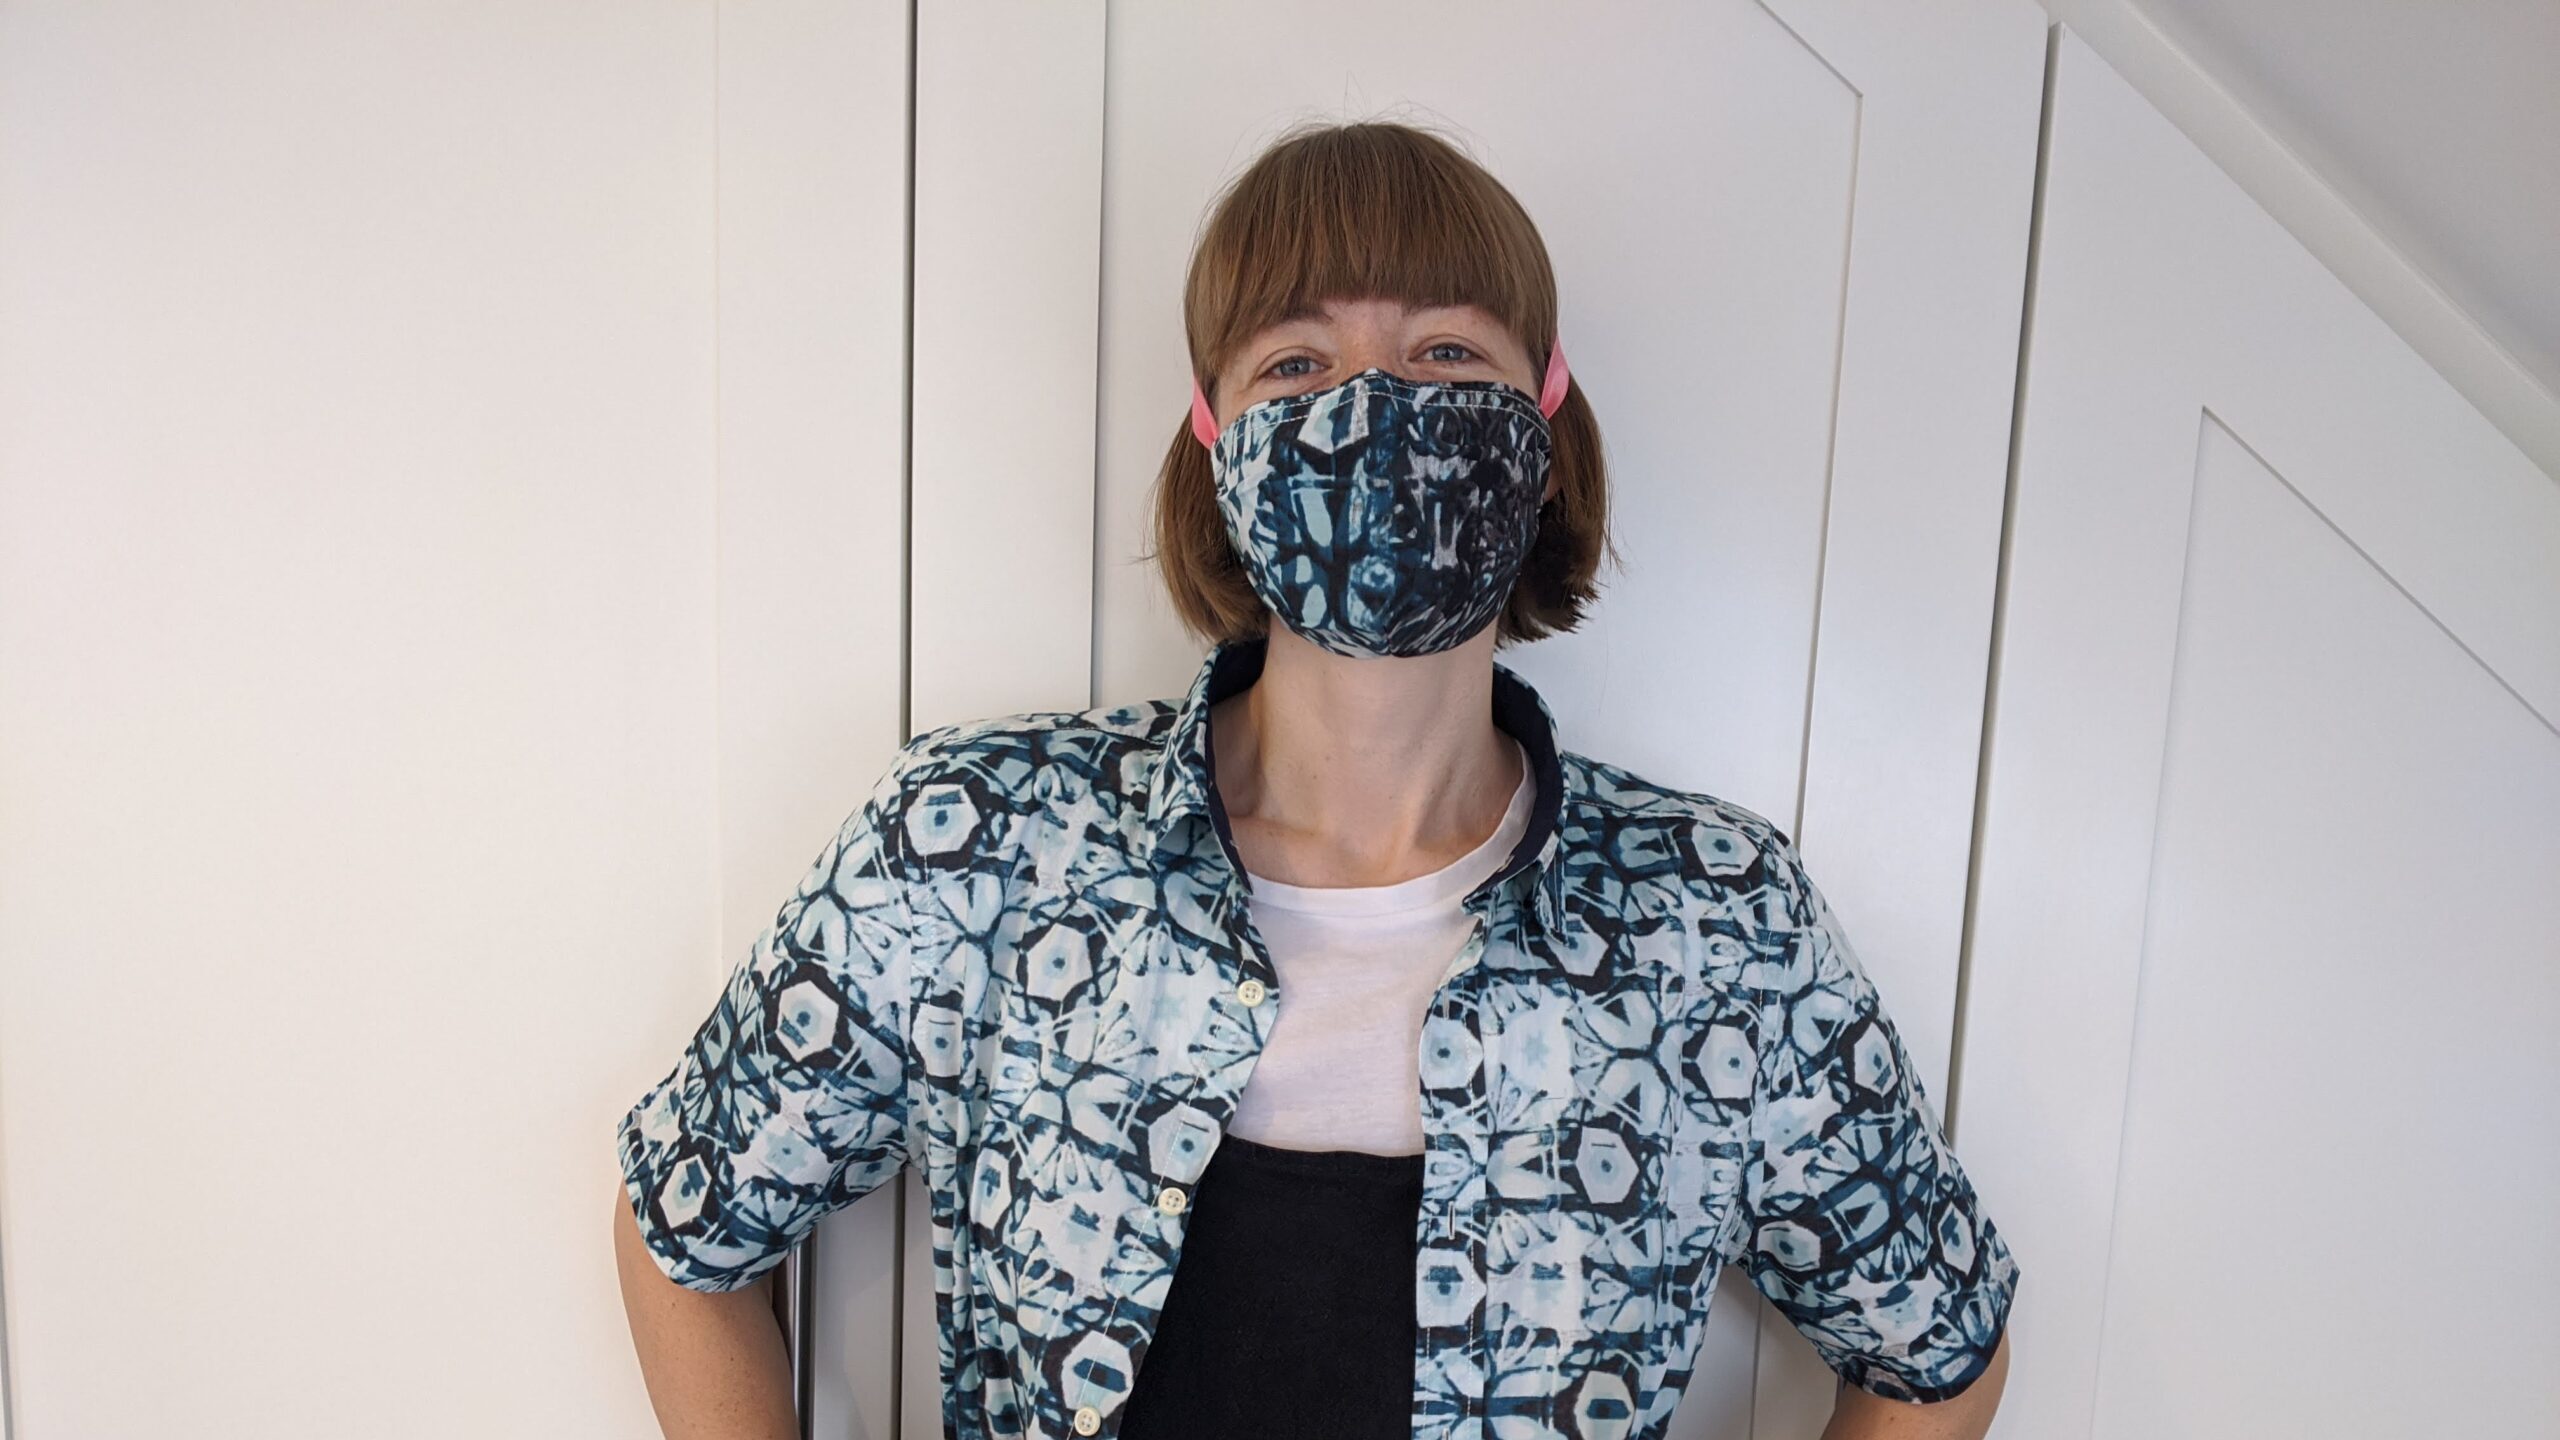
Below I’ll show you a simple way to upcycle a long-sleeved collared shirt into two facemasks (and a matching short-sleeved shirt!).
The first mask is just 5 easy steps, doesn’t even need sewing, and doesn’t require an iron.
But if you have an iron and fancy doing a bit of hand-sewing – learn to backstich to sew a simple seam by hand here – there are instructions for a second facemask in the gallery below. This mask fits slightly better, and will last longer – so jump ahead to that one if you prefer.
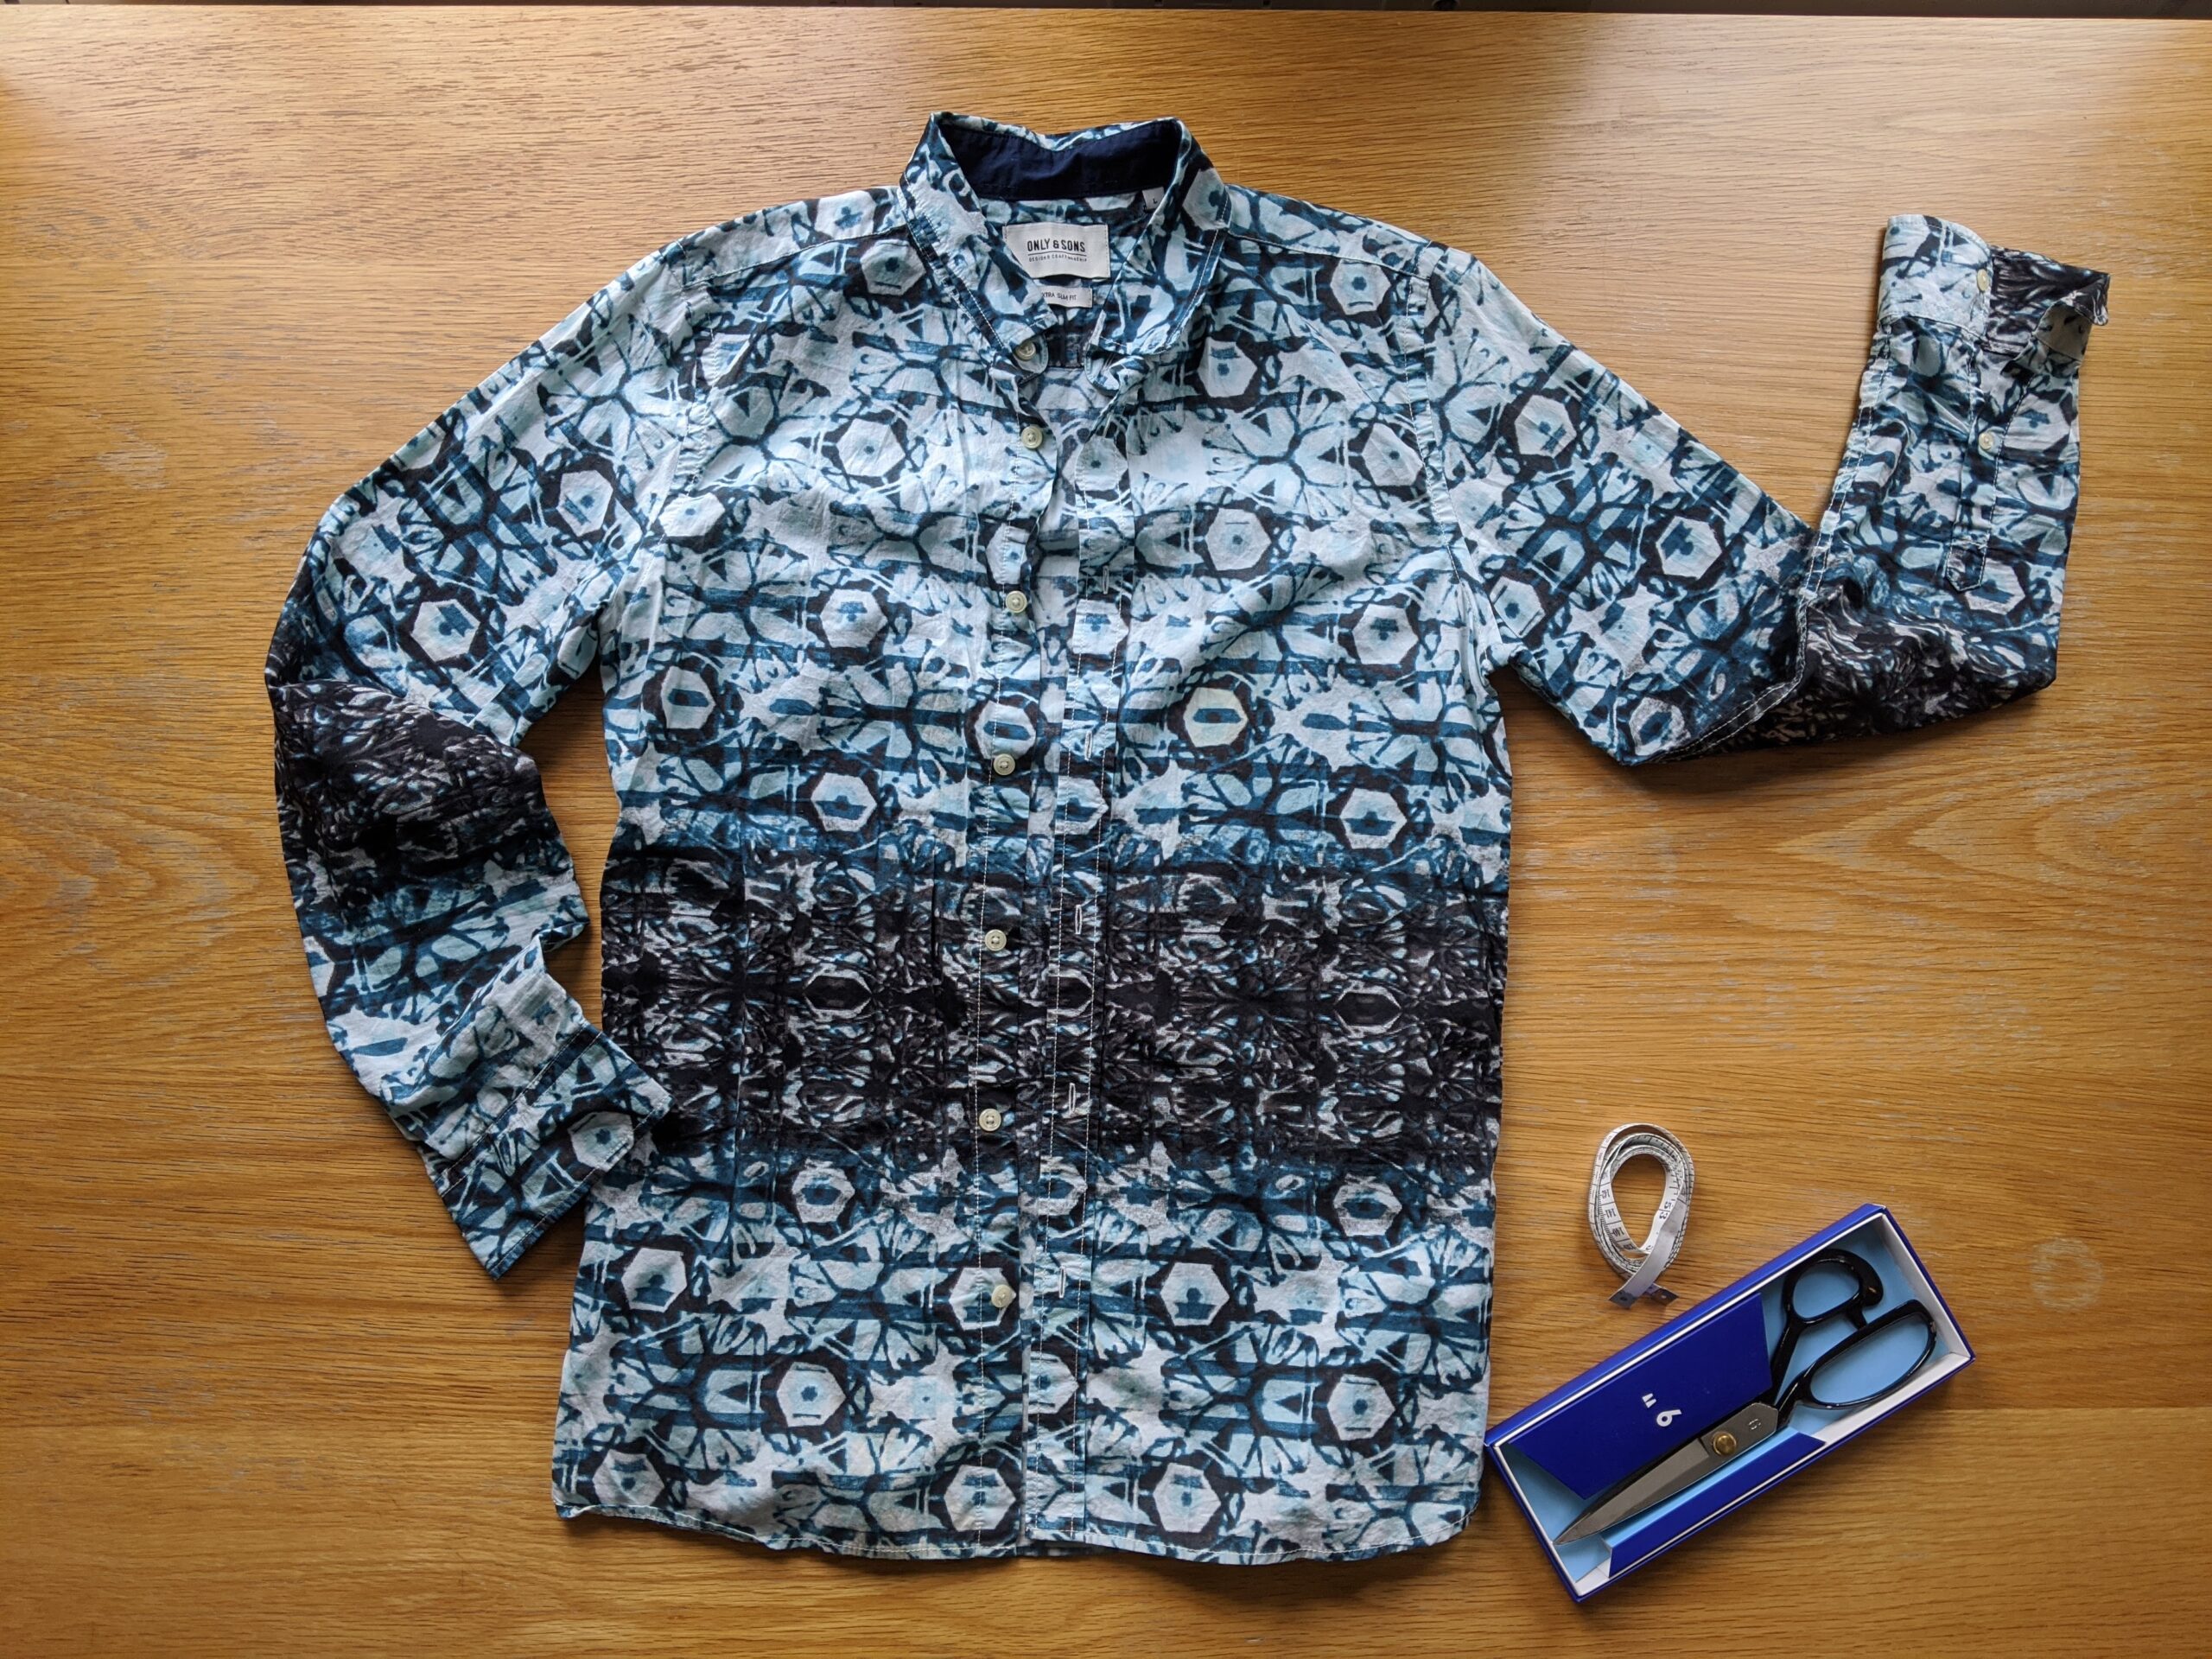
Upcycled shirtsleeve facemask (no-sew, no iron)
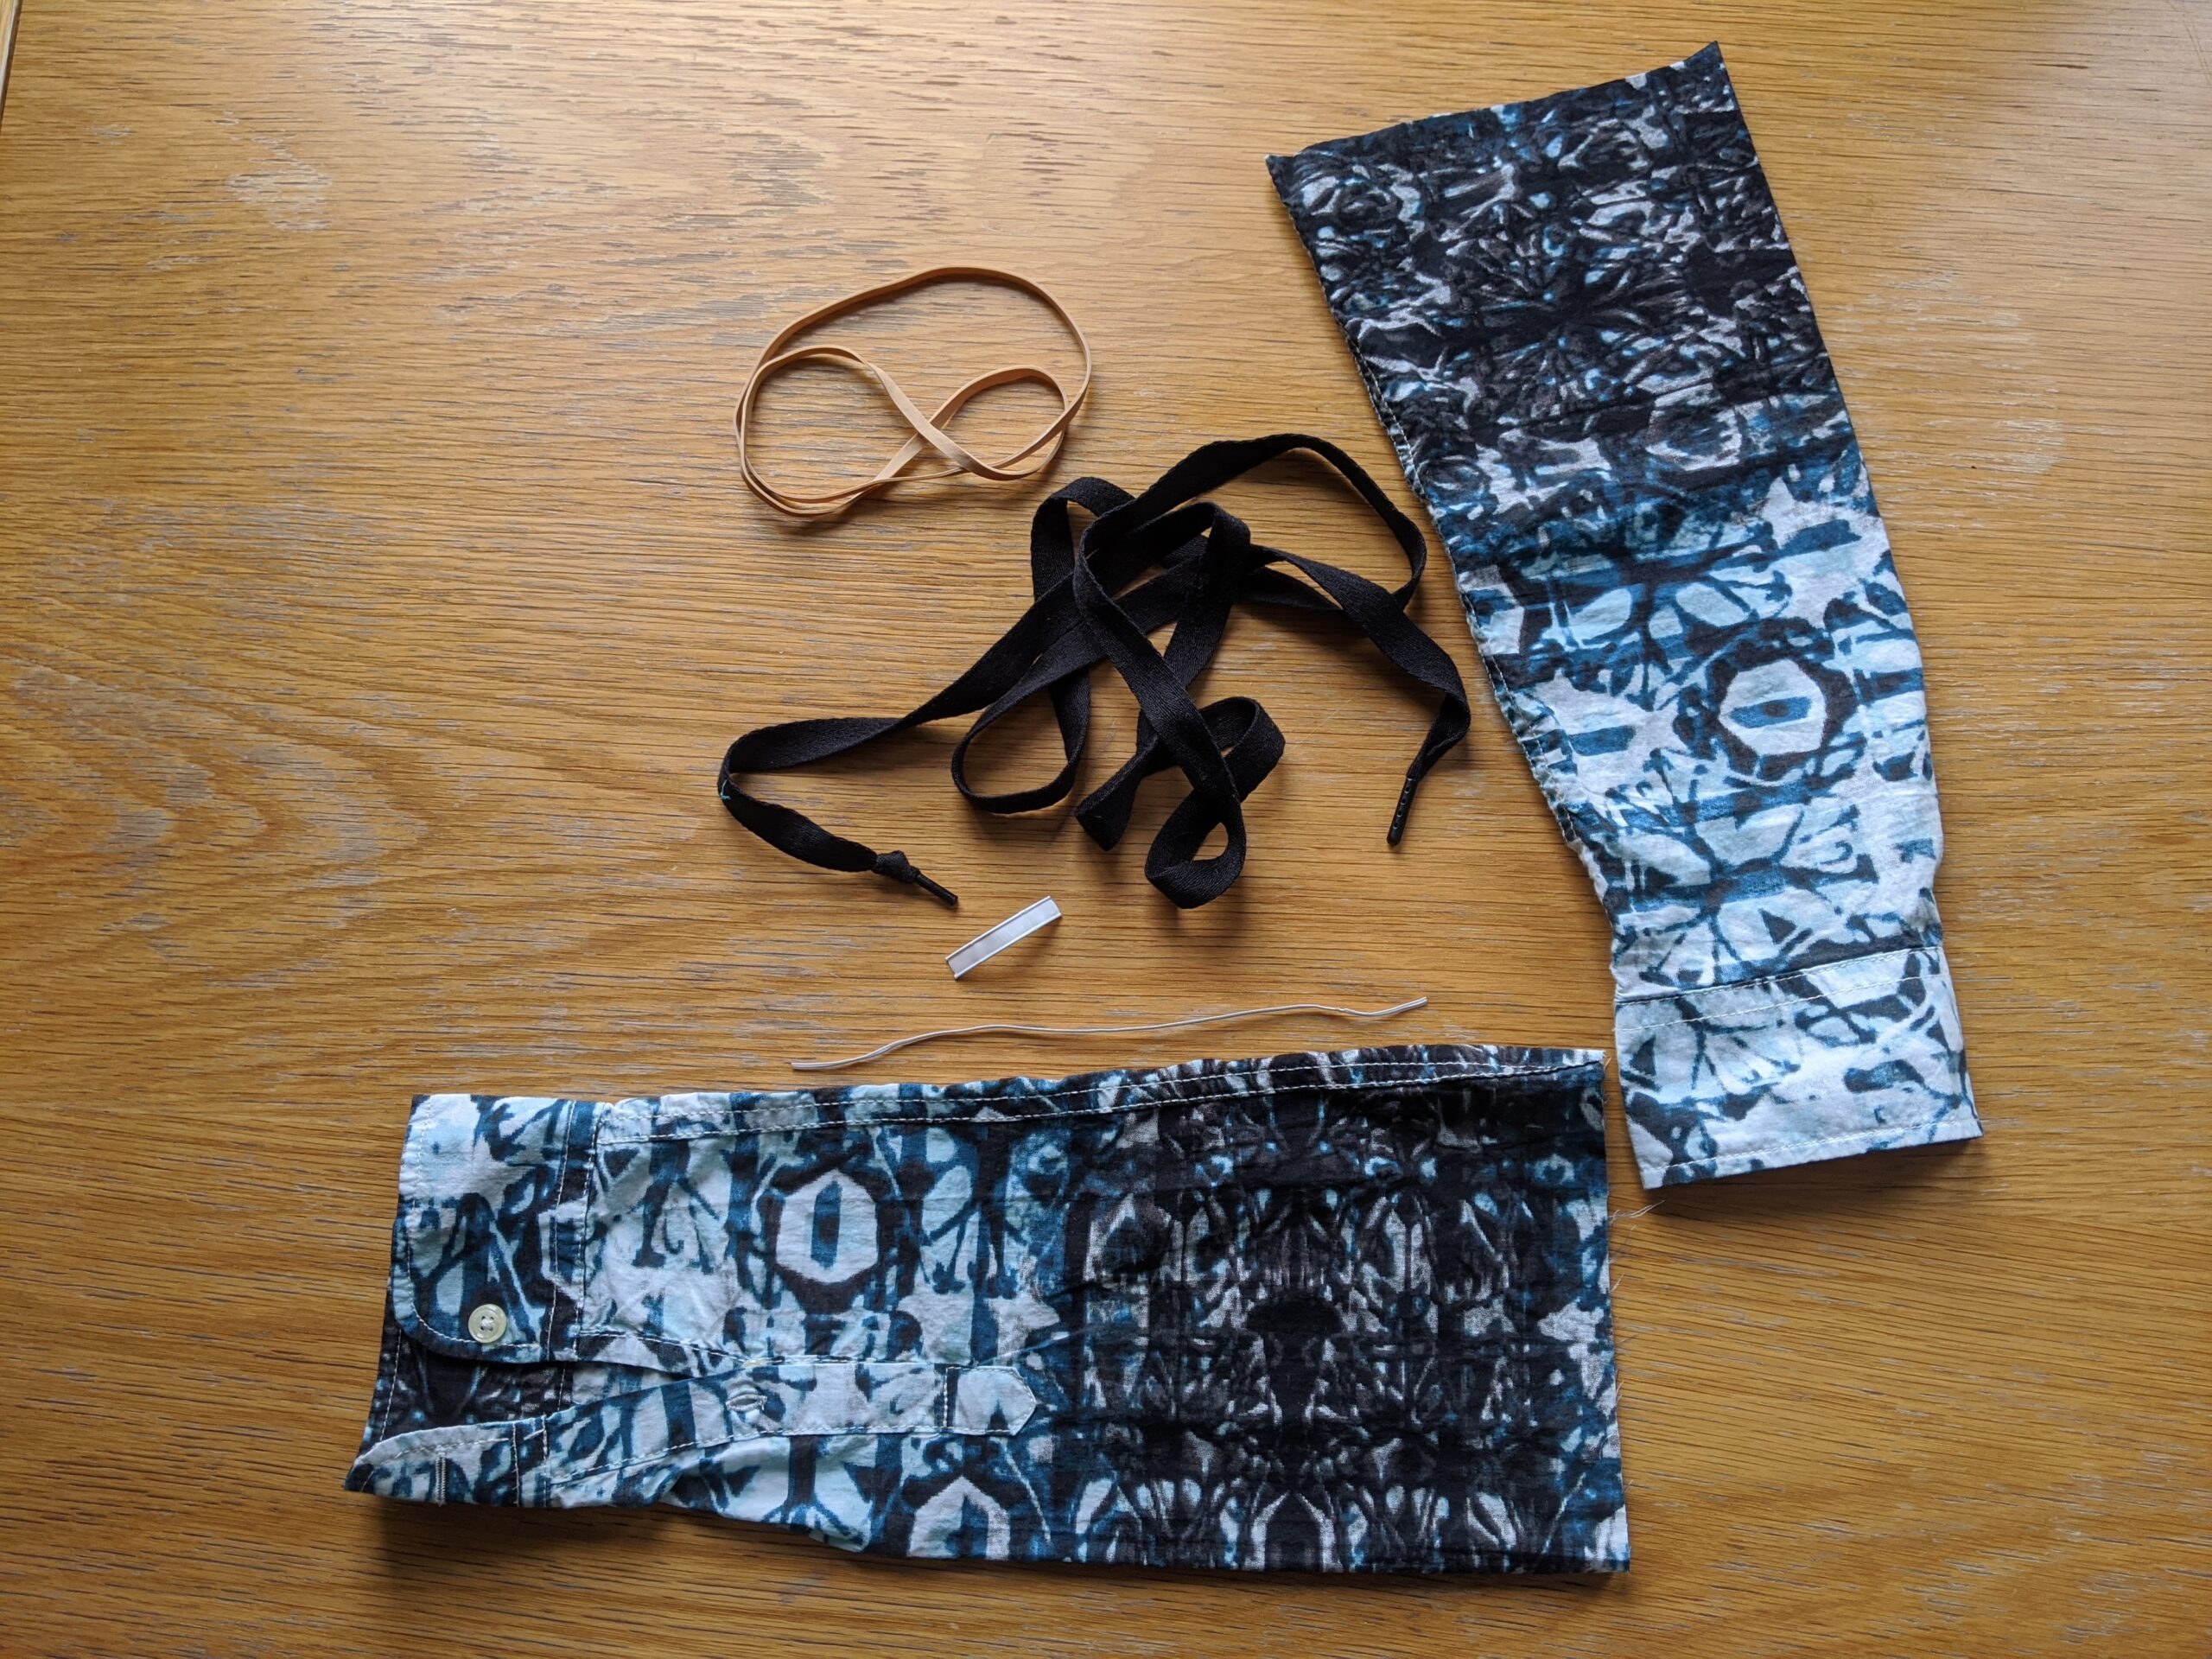
You’ll need a shirt (or just a sleeve), some decent scissors and at least two safety pins, or four ideally.
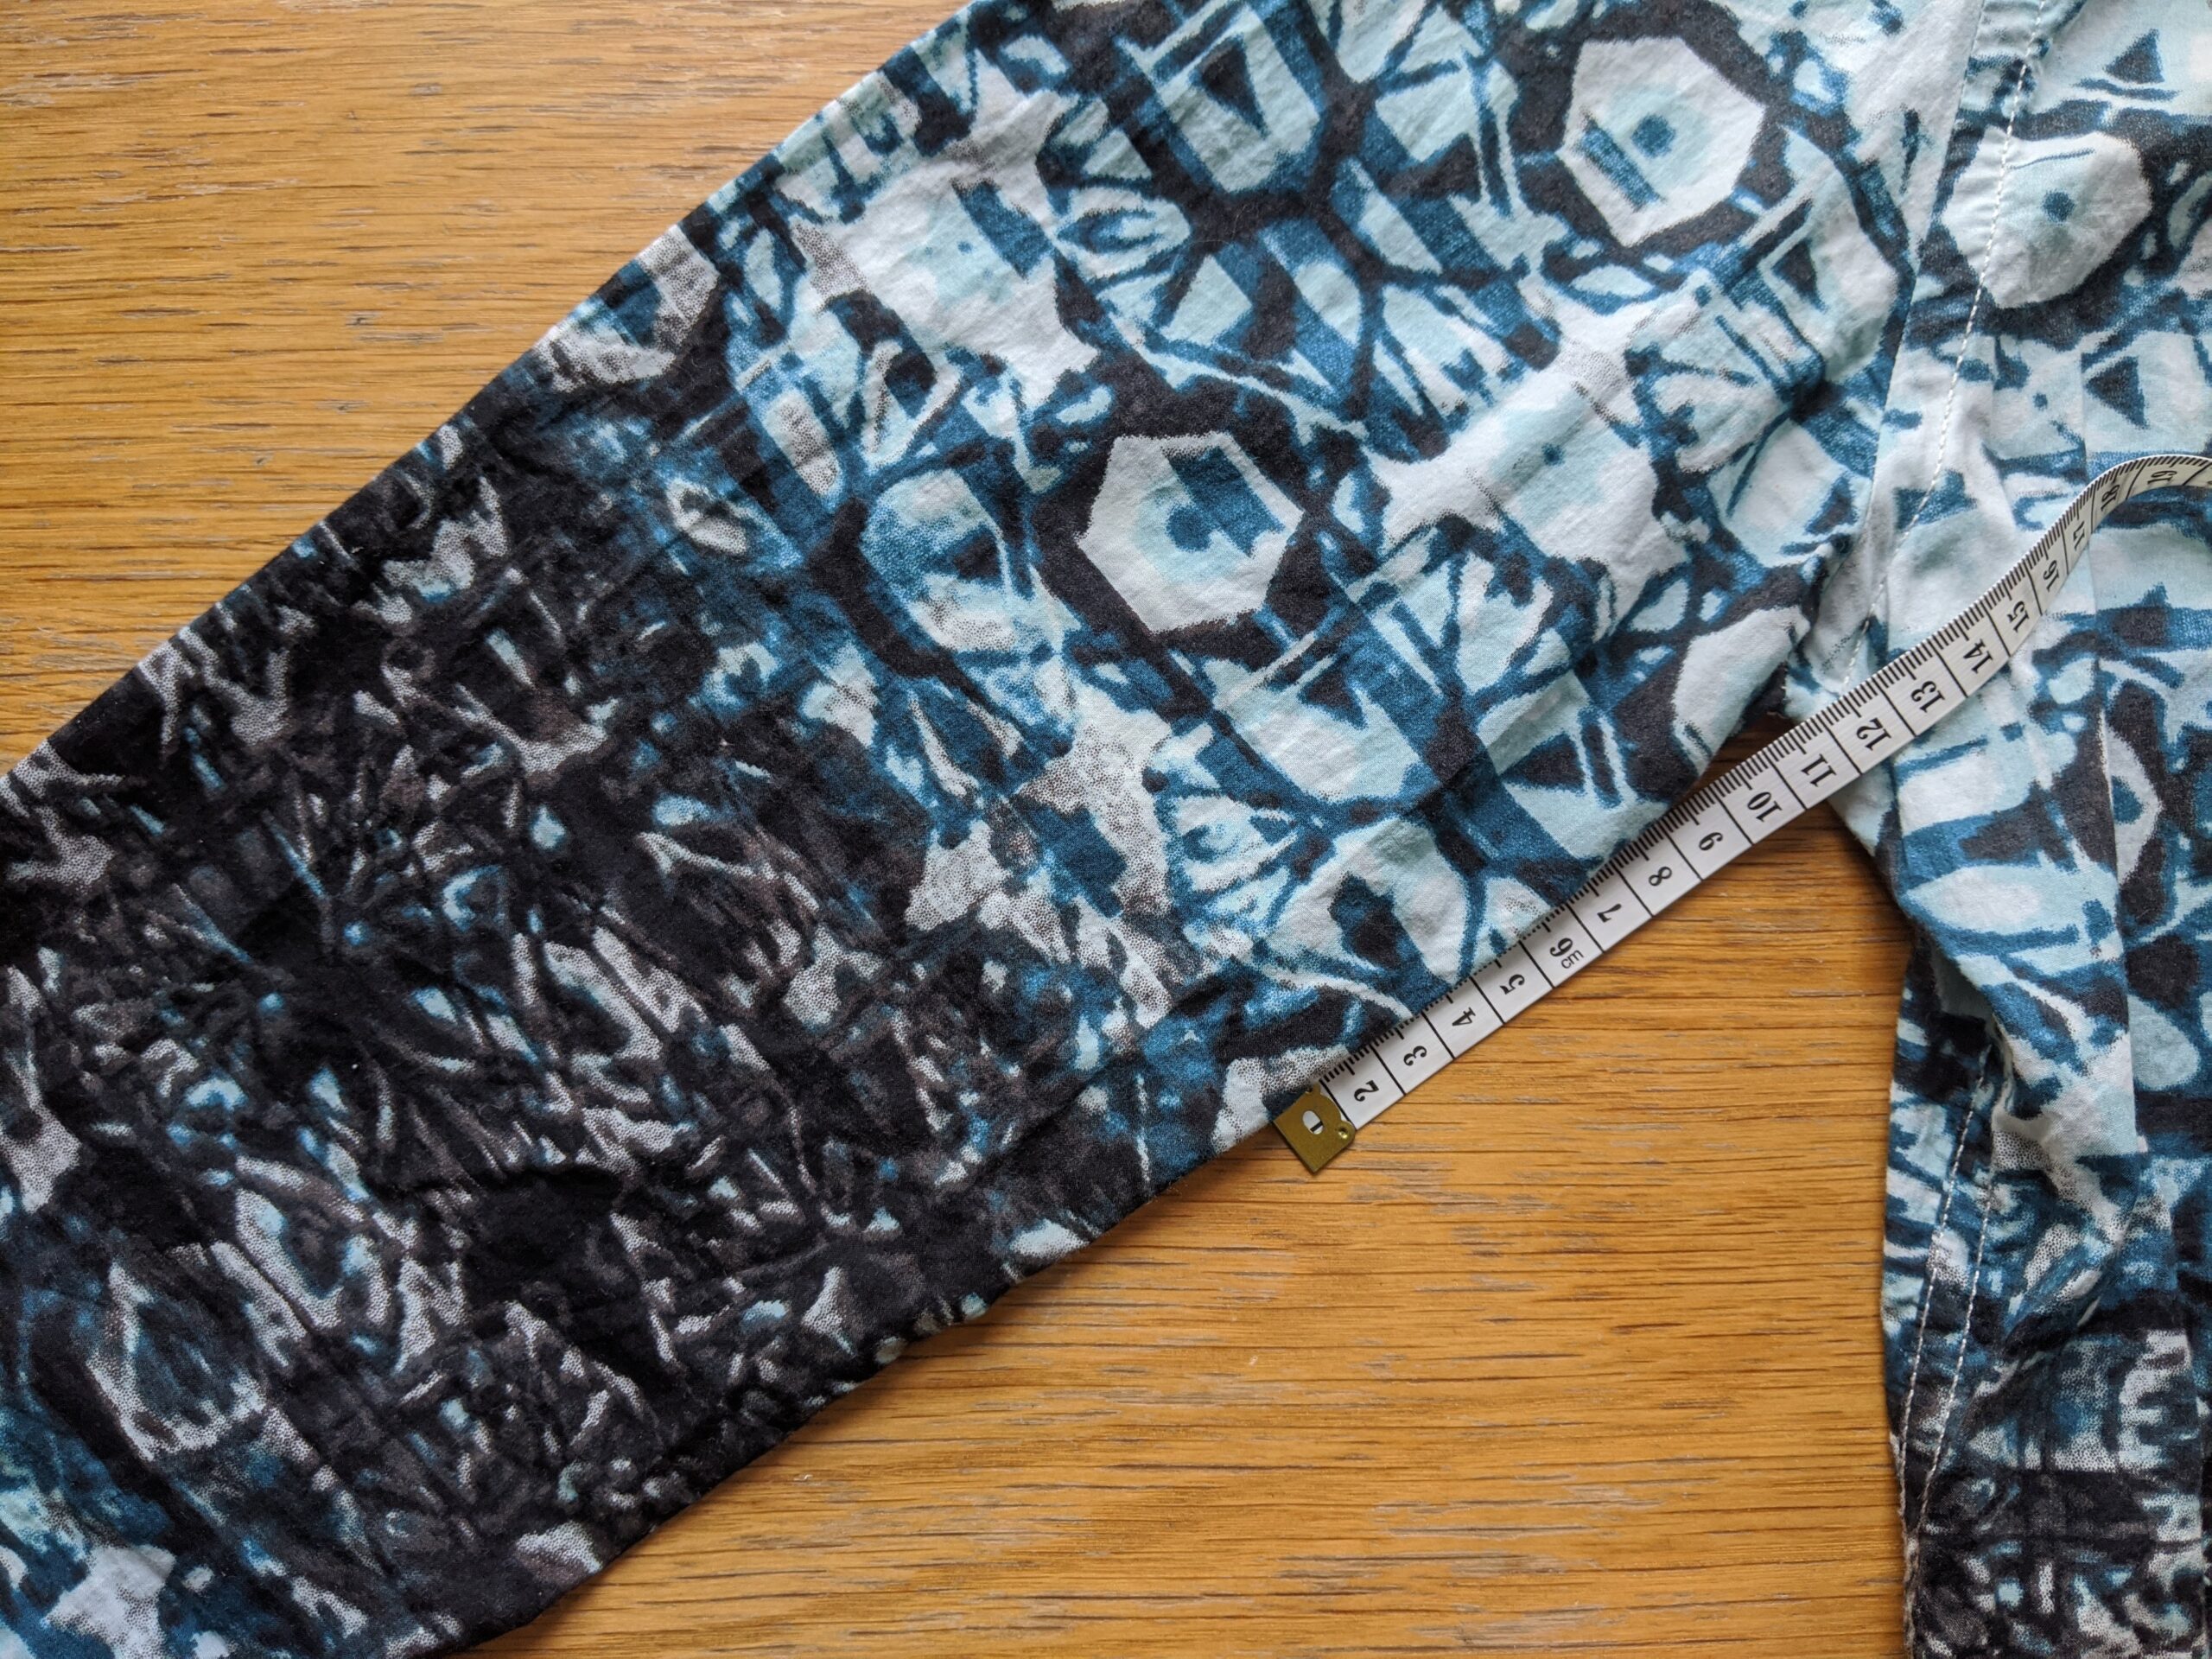
1. Measure twice, cut once
When upcycling any clothing by cutting bits off, really think about what you want to achieve by putting the item on and working out how much you’re happy with losing.
To make two masks from shirtsleeves, put on the shirt to check your desired sleeve length. Measure carefully on both sides, as shown below. Use one side to help guide where you cut the other. You’ll likely want to hem (or fold) the cut sleeve, so leave at least 2cm to do this if you can.
2. Gather your materials
A bit of home salvage can bring up some brilliant materials to recycle into mask components. Pull together what you think might be useful for the nose bridge wire and strap. You can choose the best solution once you’ve measured what works with the amount of material you have.
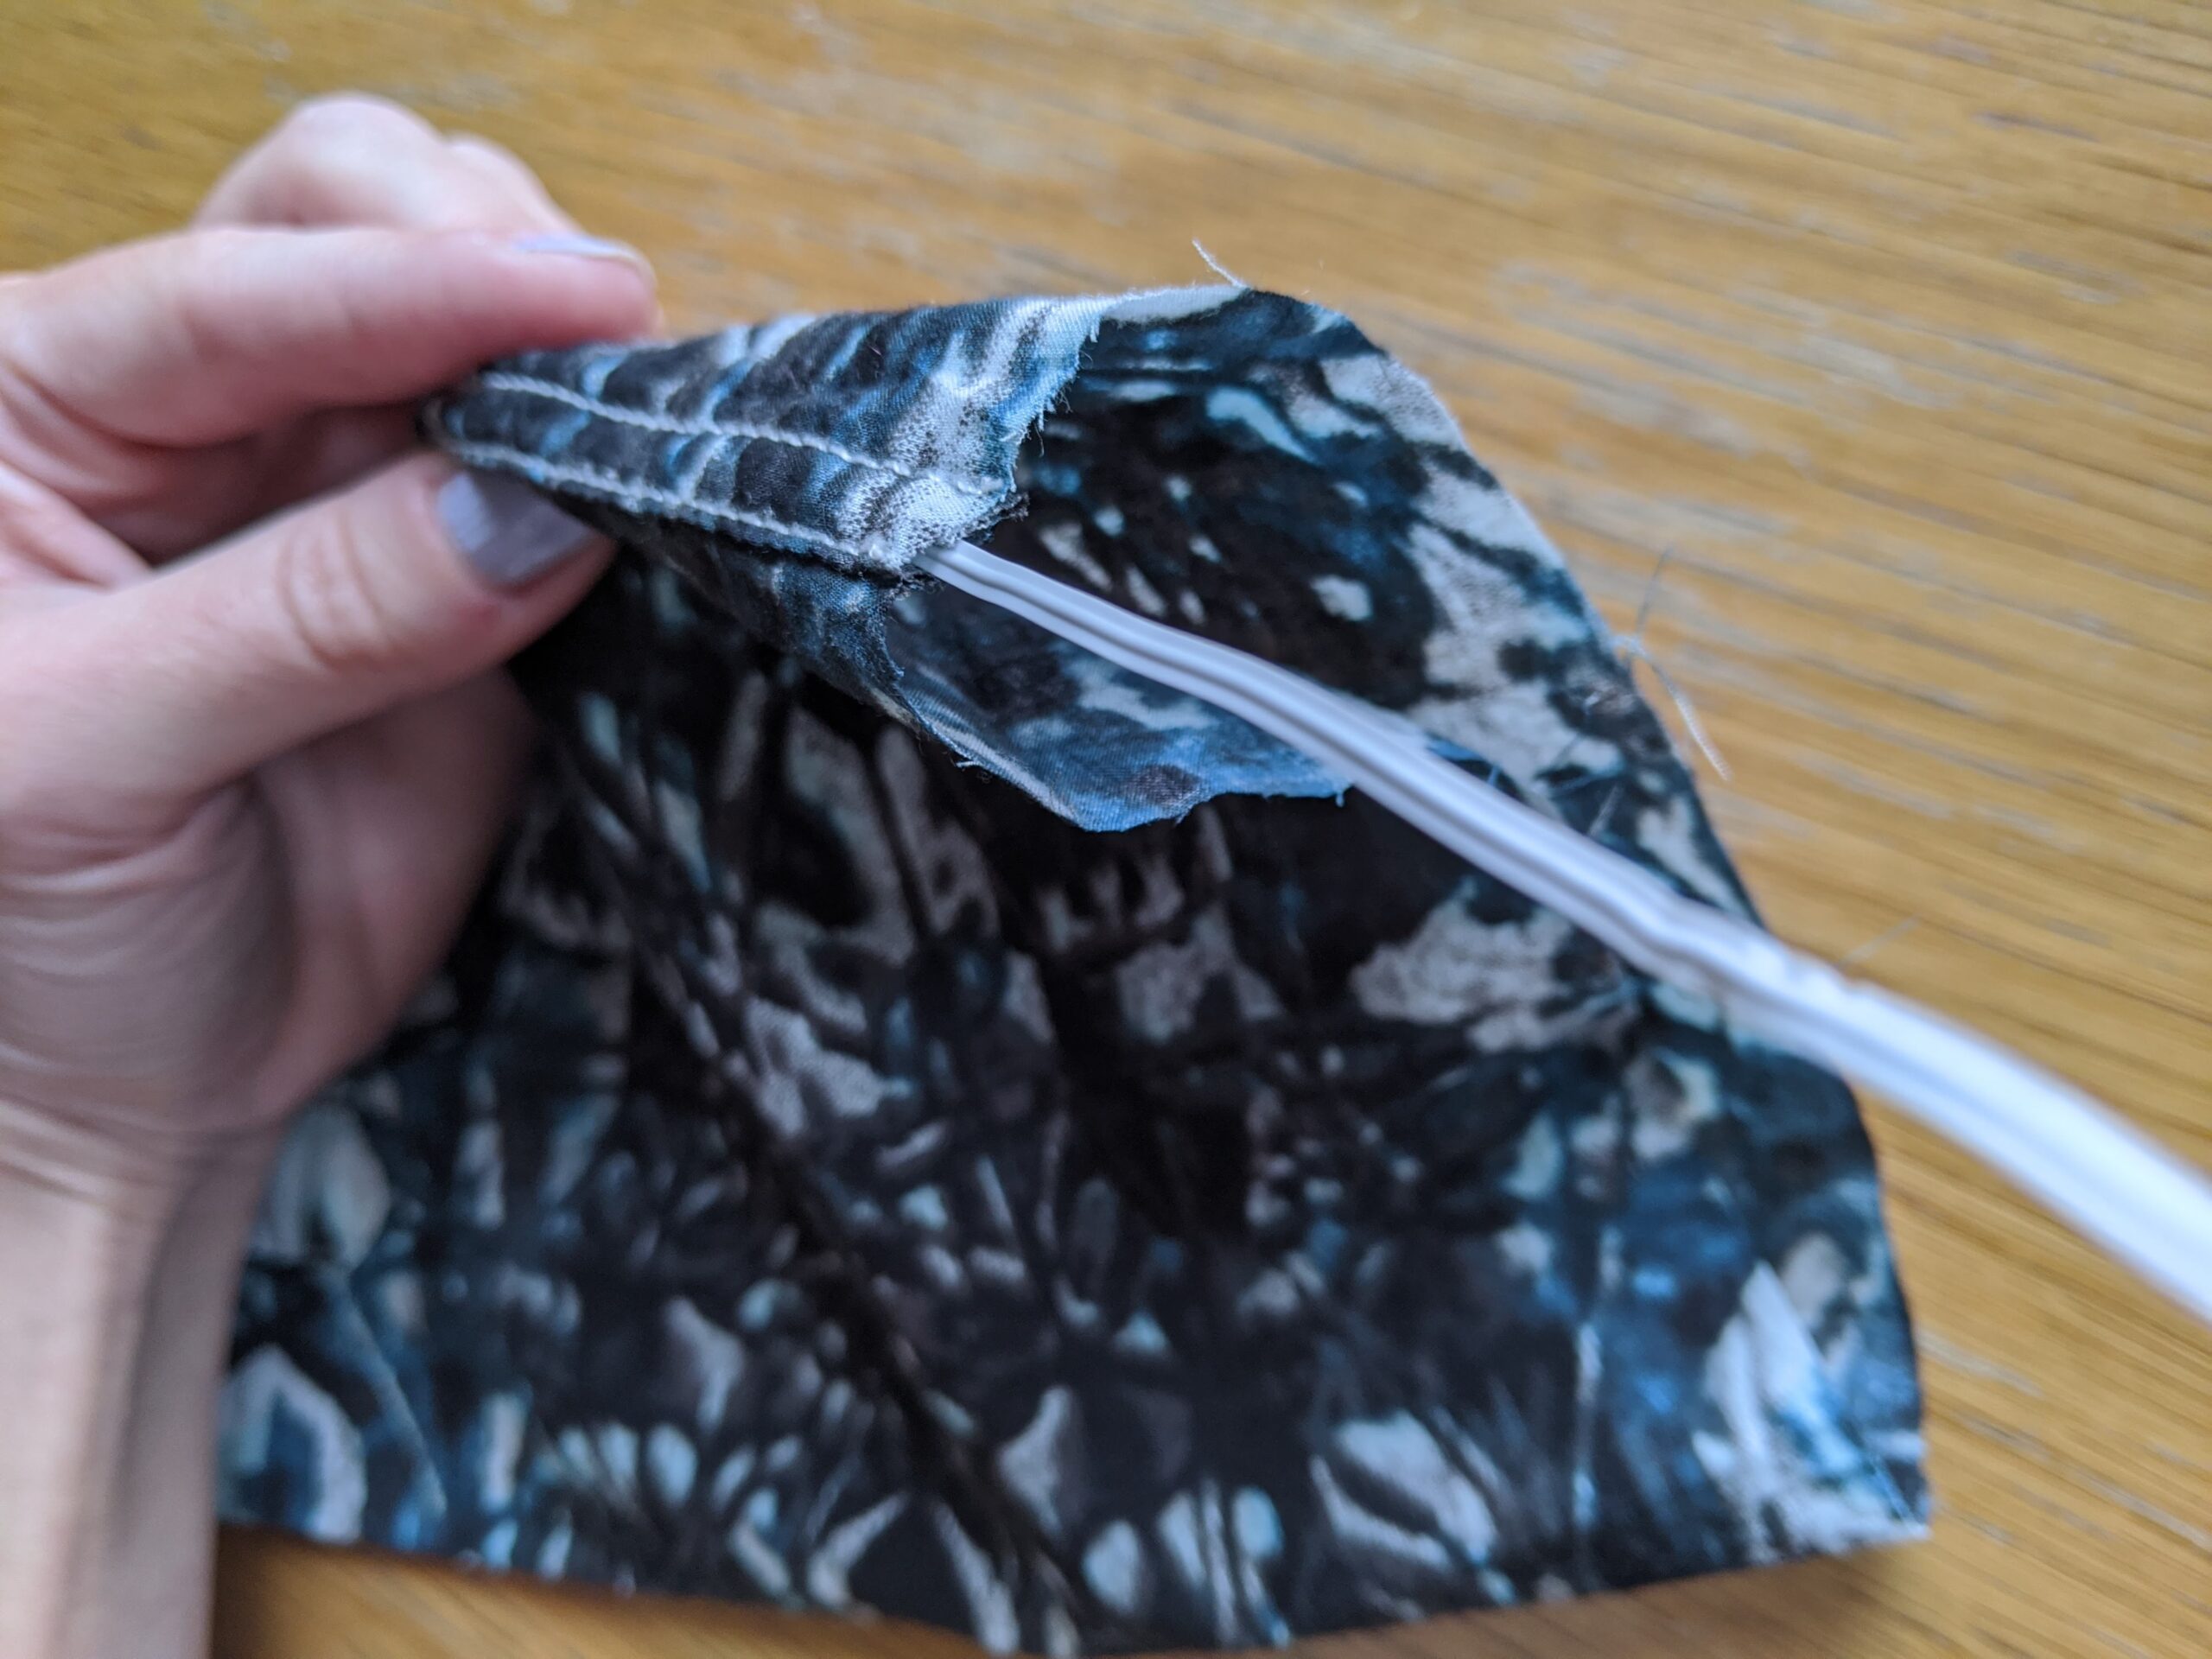
3. It’s like shirtsleeves were designed to add thin nose wires!
Here’s a nifty trick: you can insert a thin, nose bridge wire into the double-stitched seam on shirt-sleeves. No sewing required!
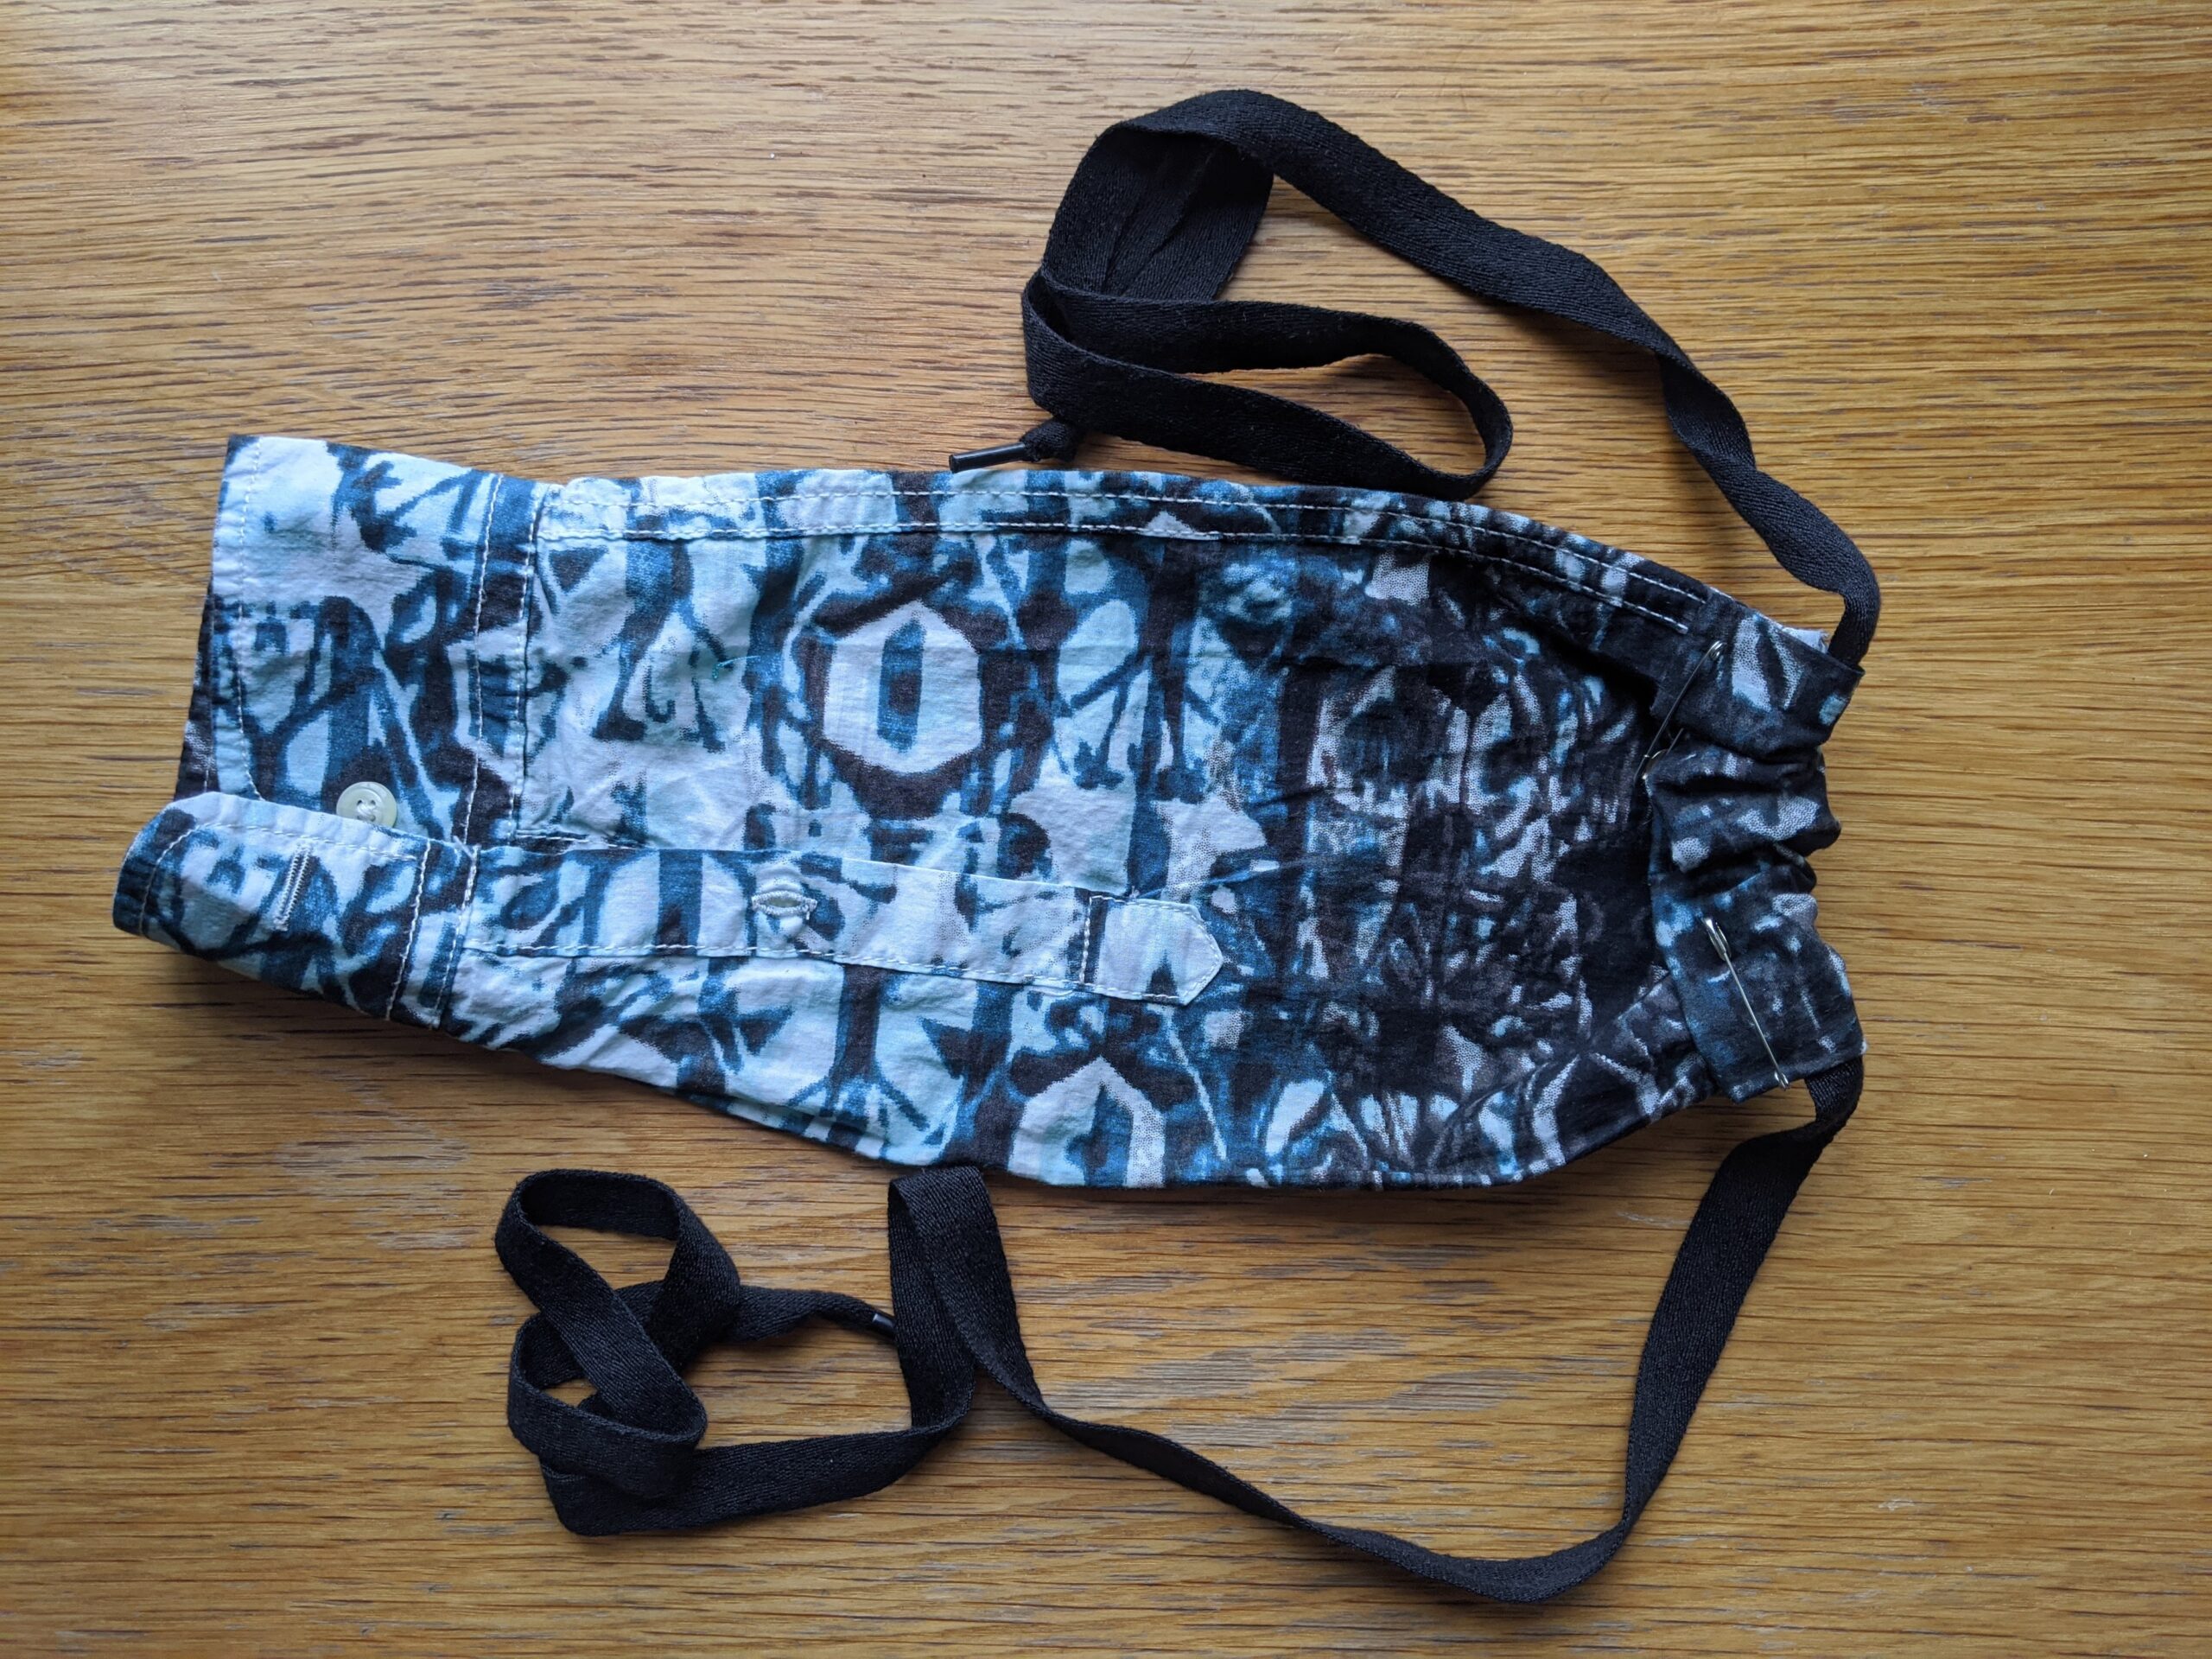
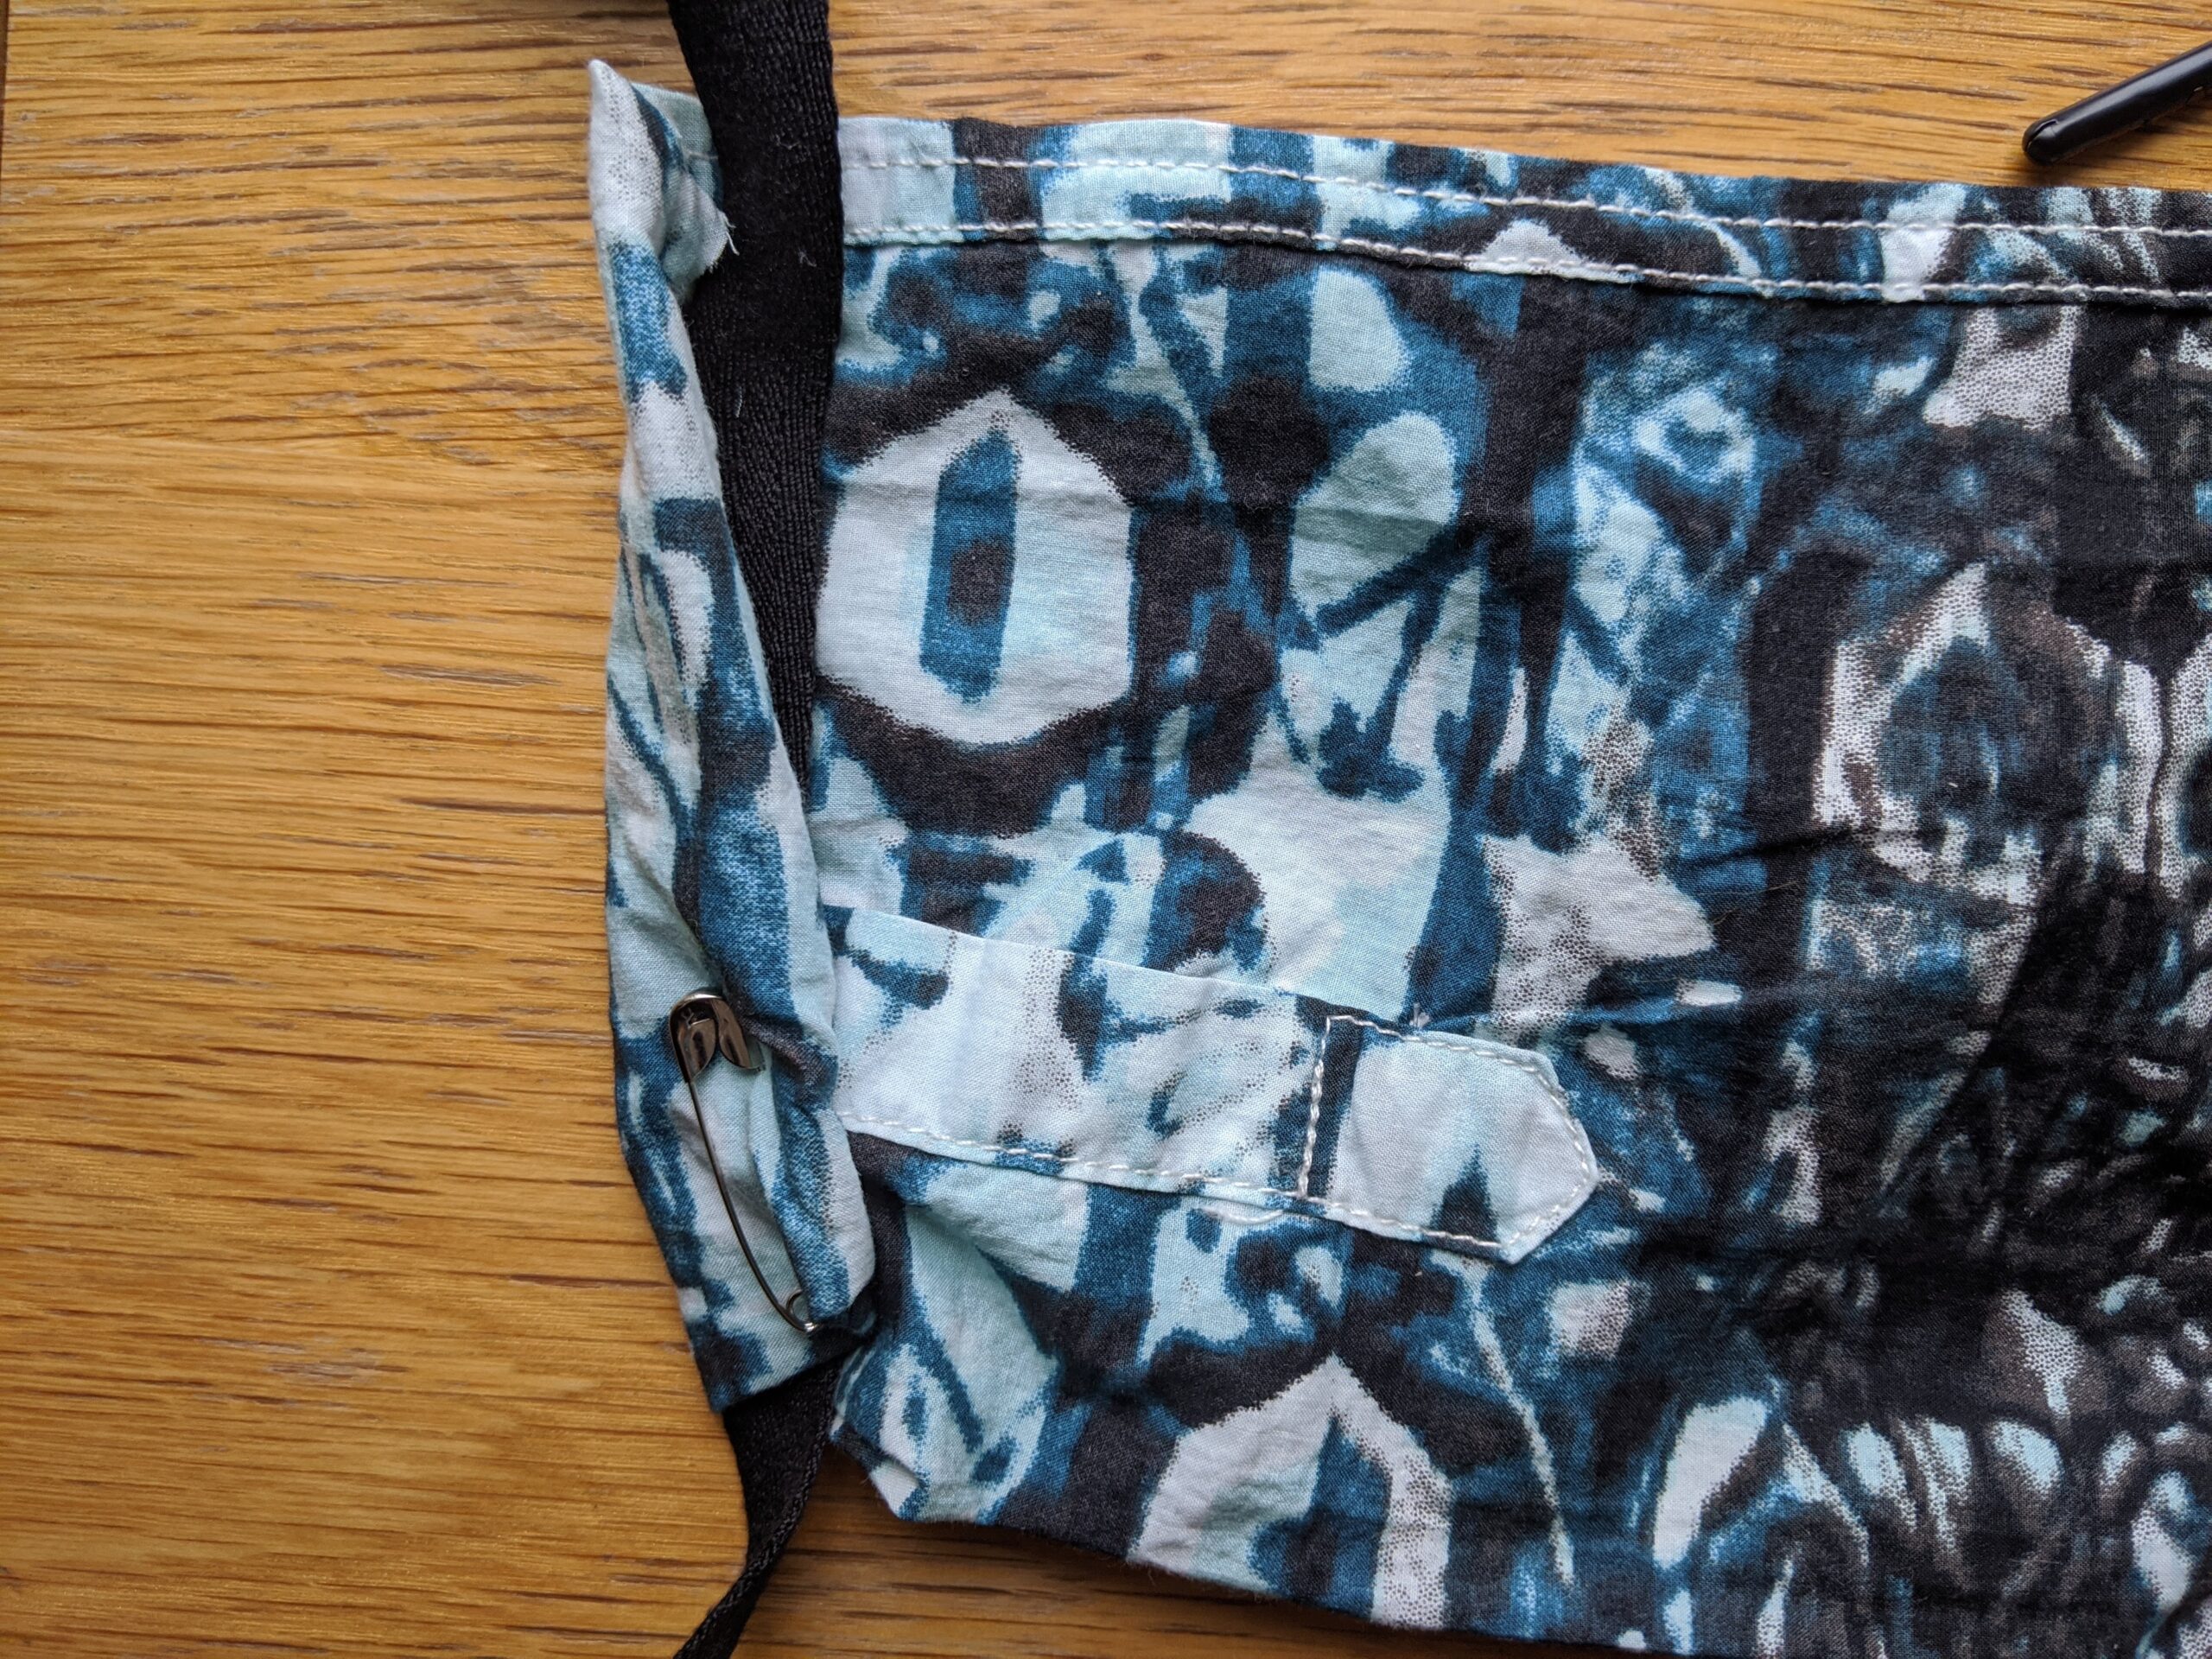
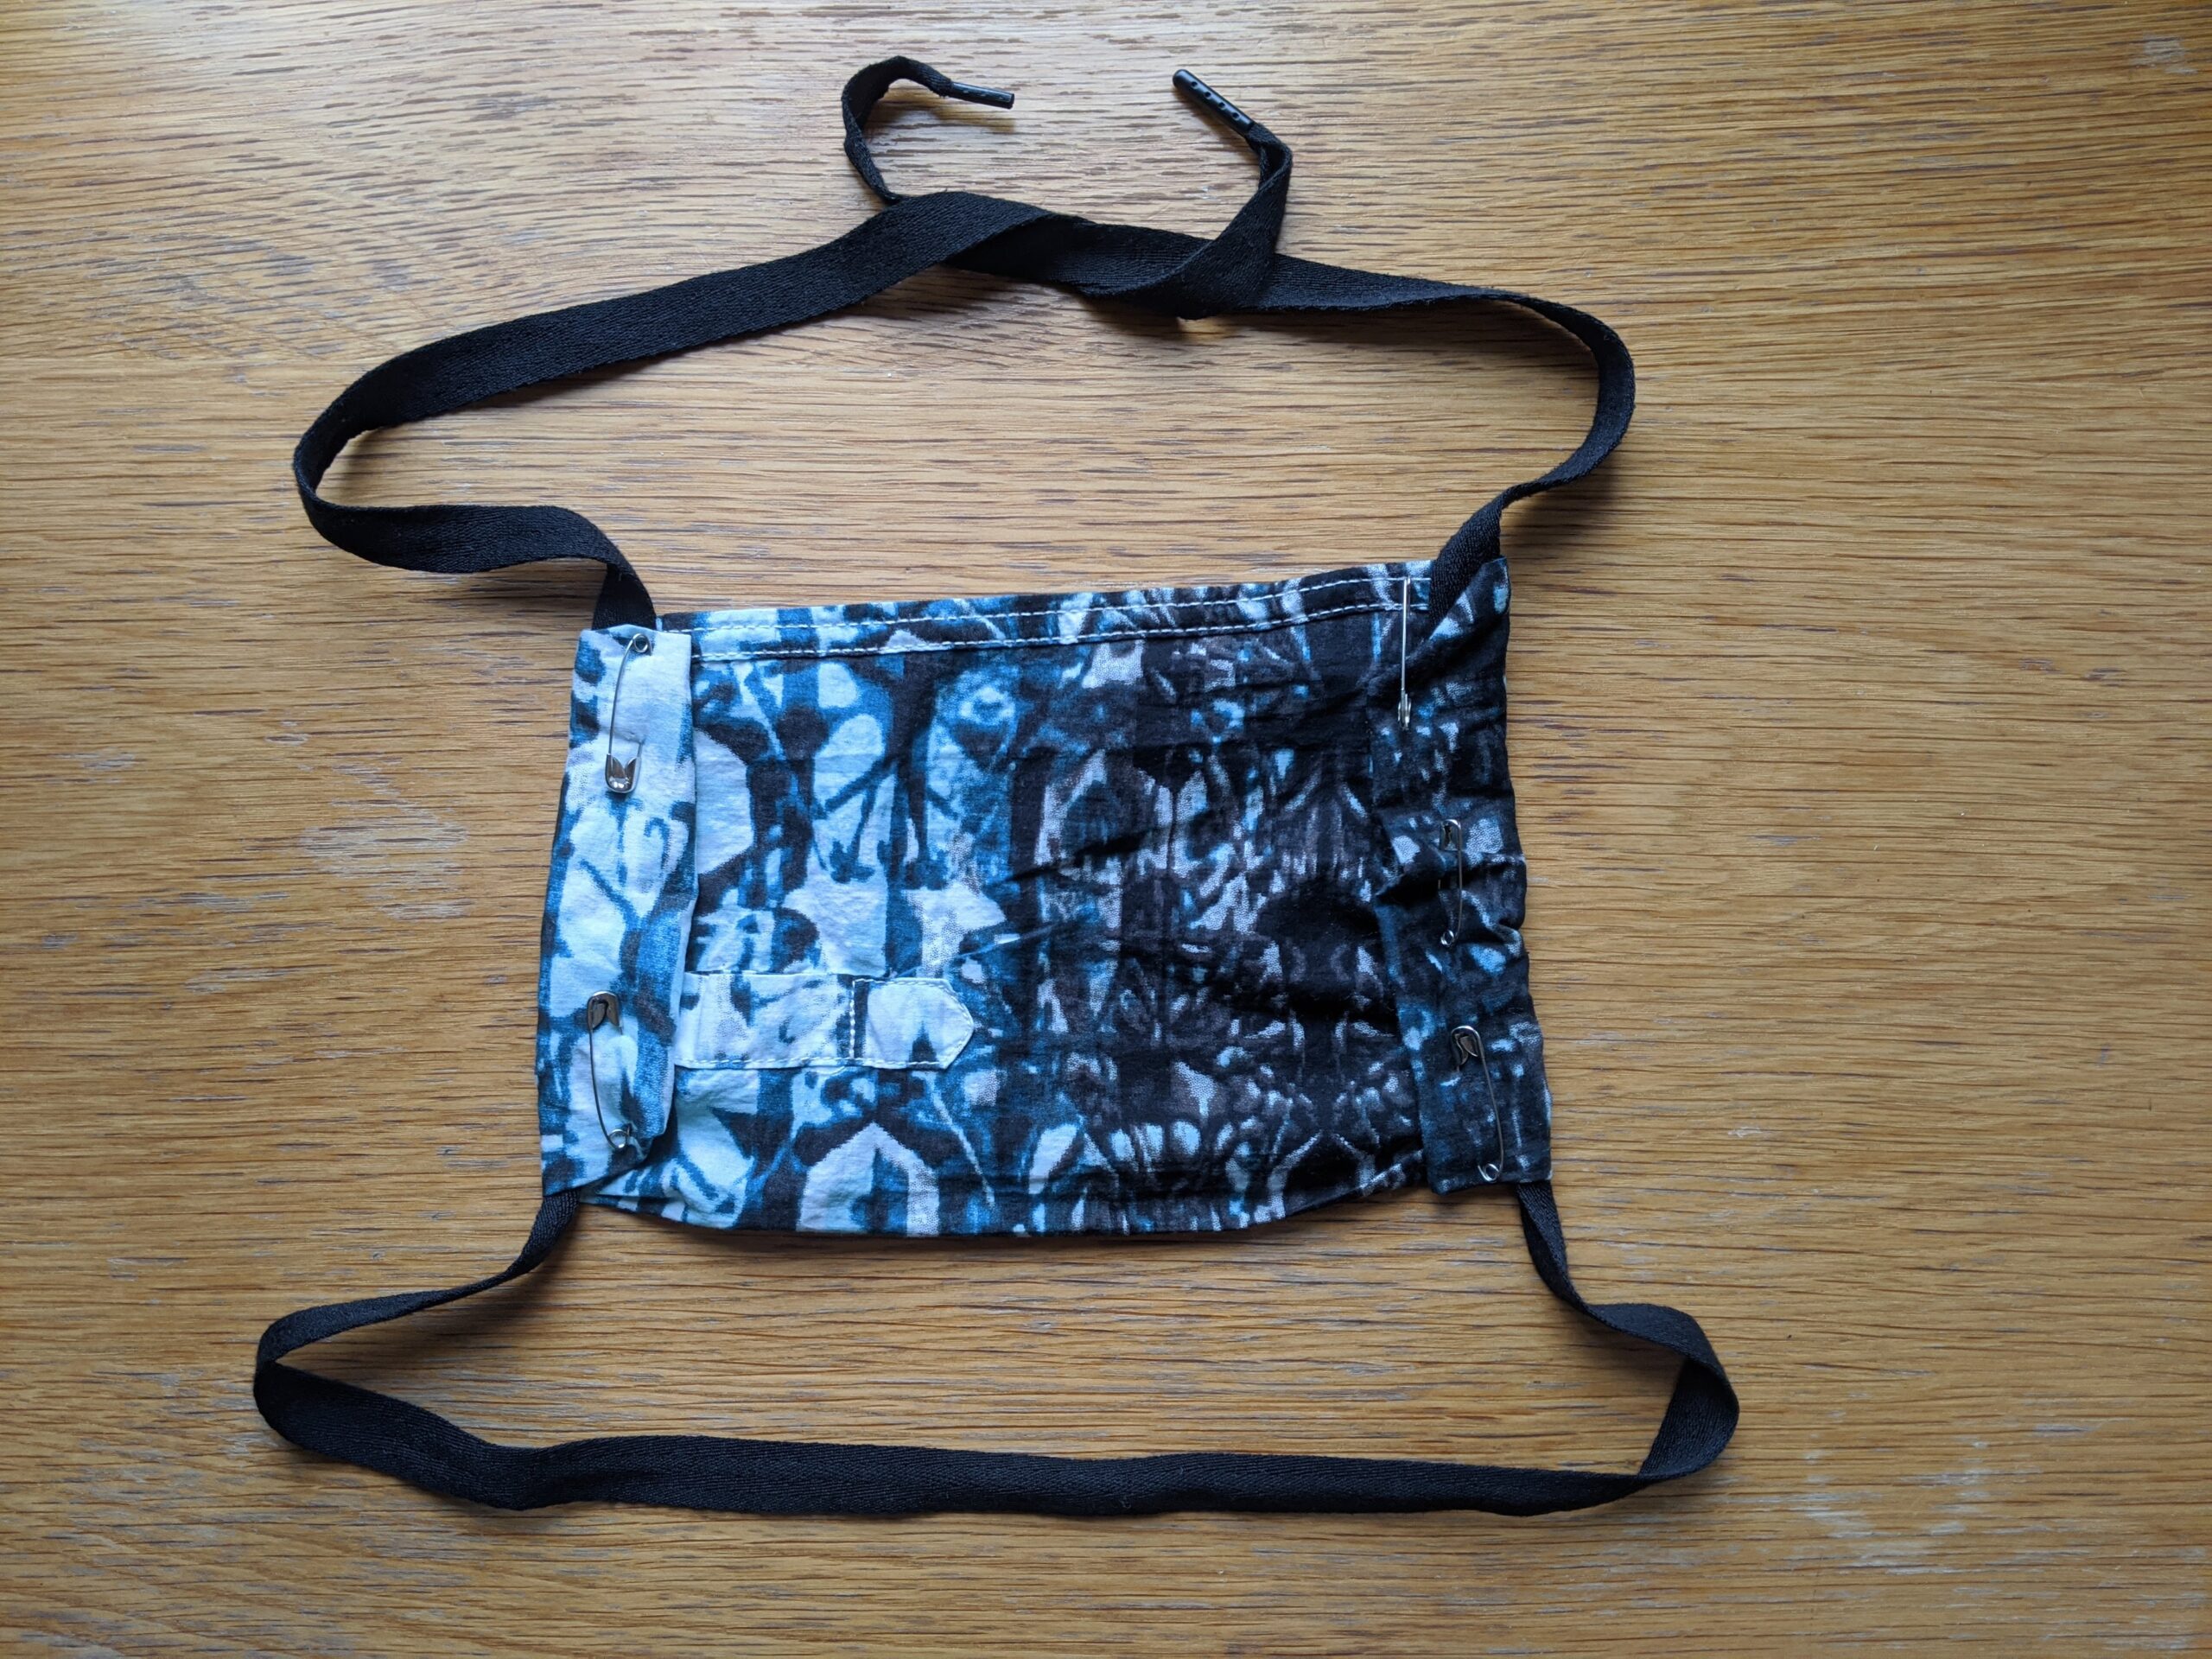
4. Fold each side in and secure with safety pins
Insert your chosen head-strap material before folding and pinning. Make sure not to pin the strap, so you can adjust it.
I really don’t like earloops, so I’m using a single shoelace-like flat strap that probably fell out of a hoodie years ago. It’s over a metre long, but any ribbon over around 60cm would also work.
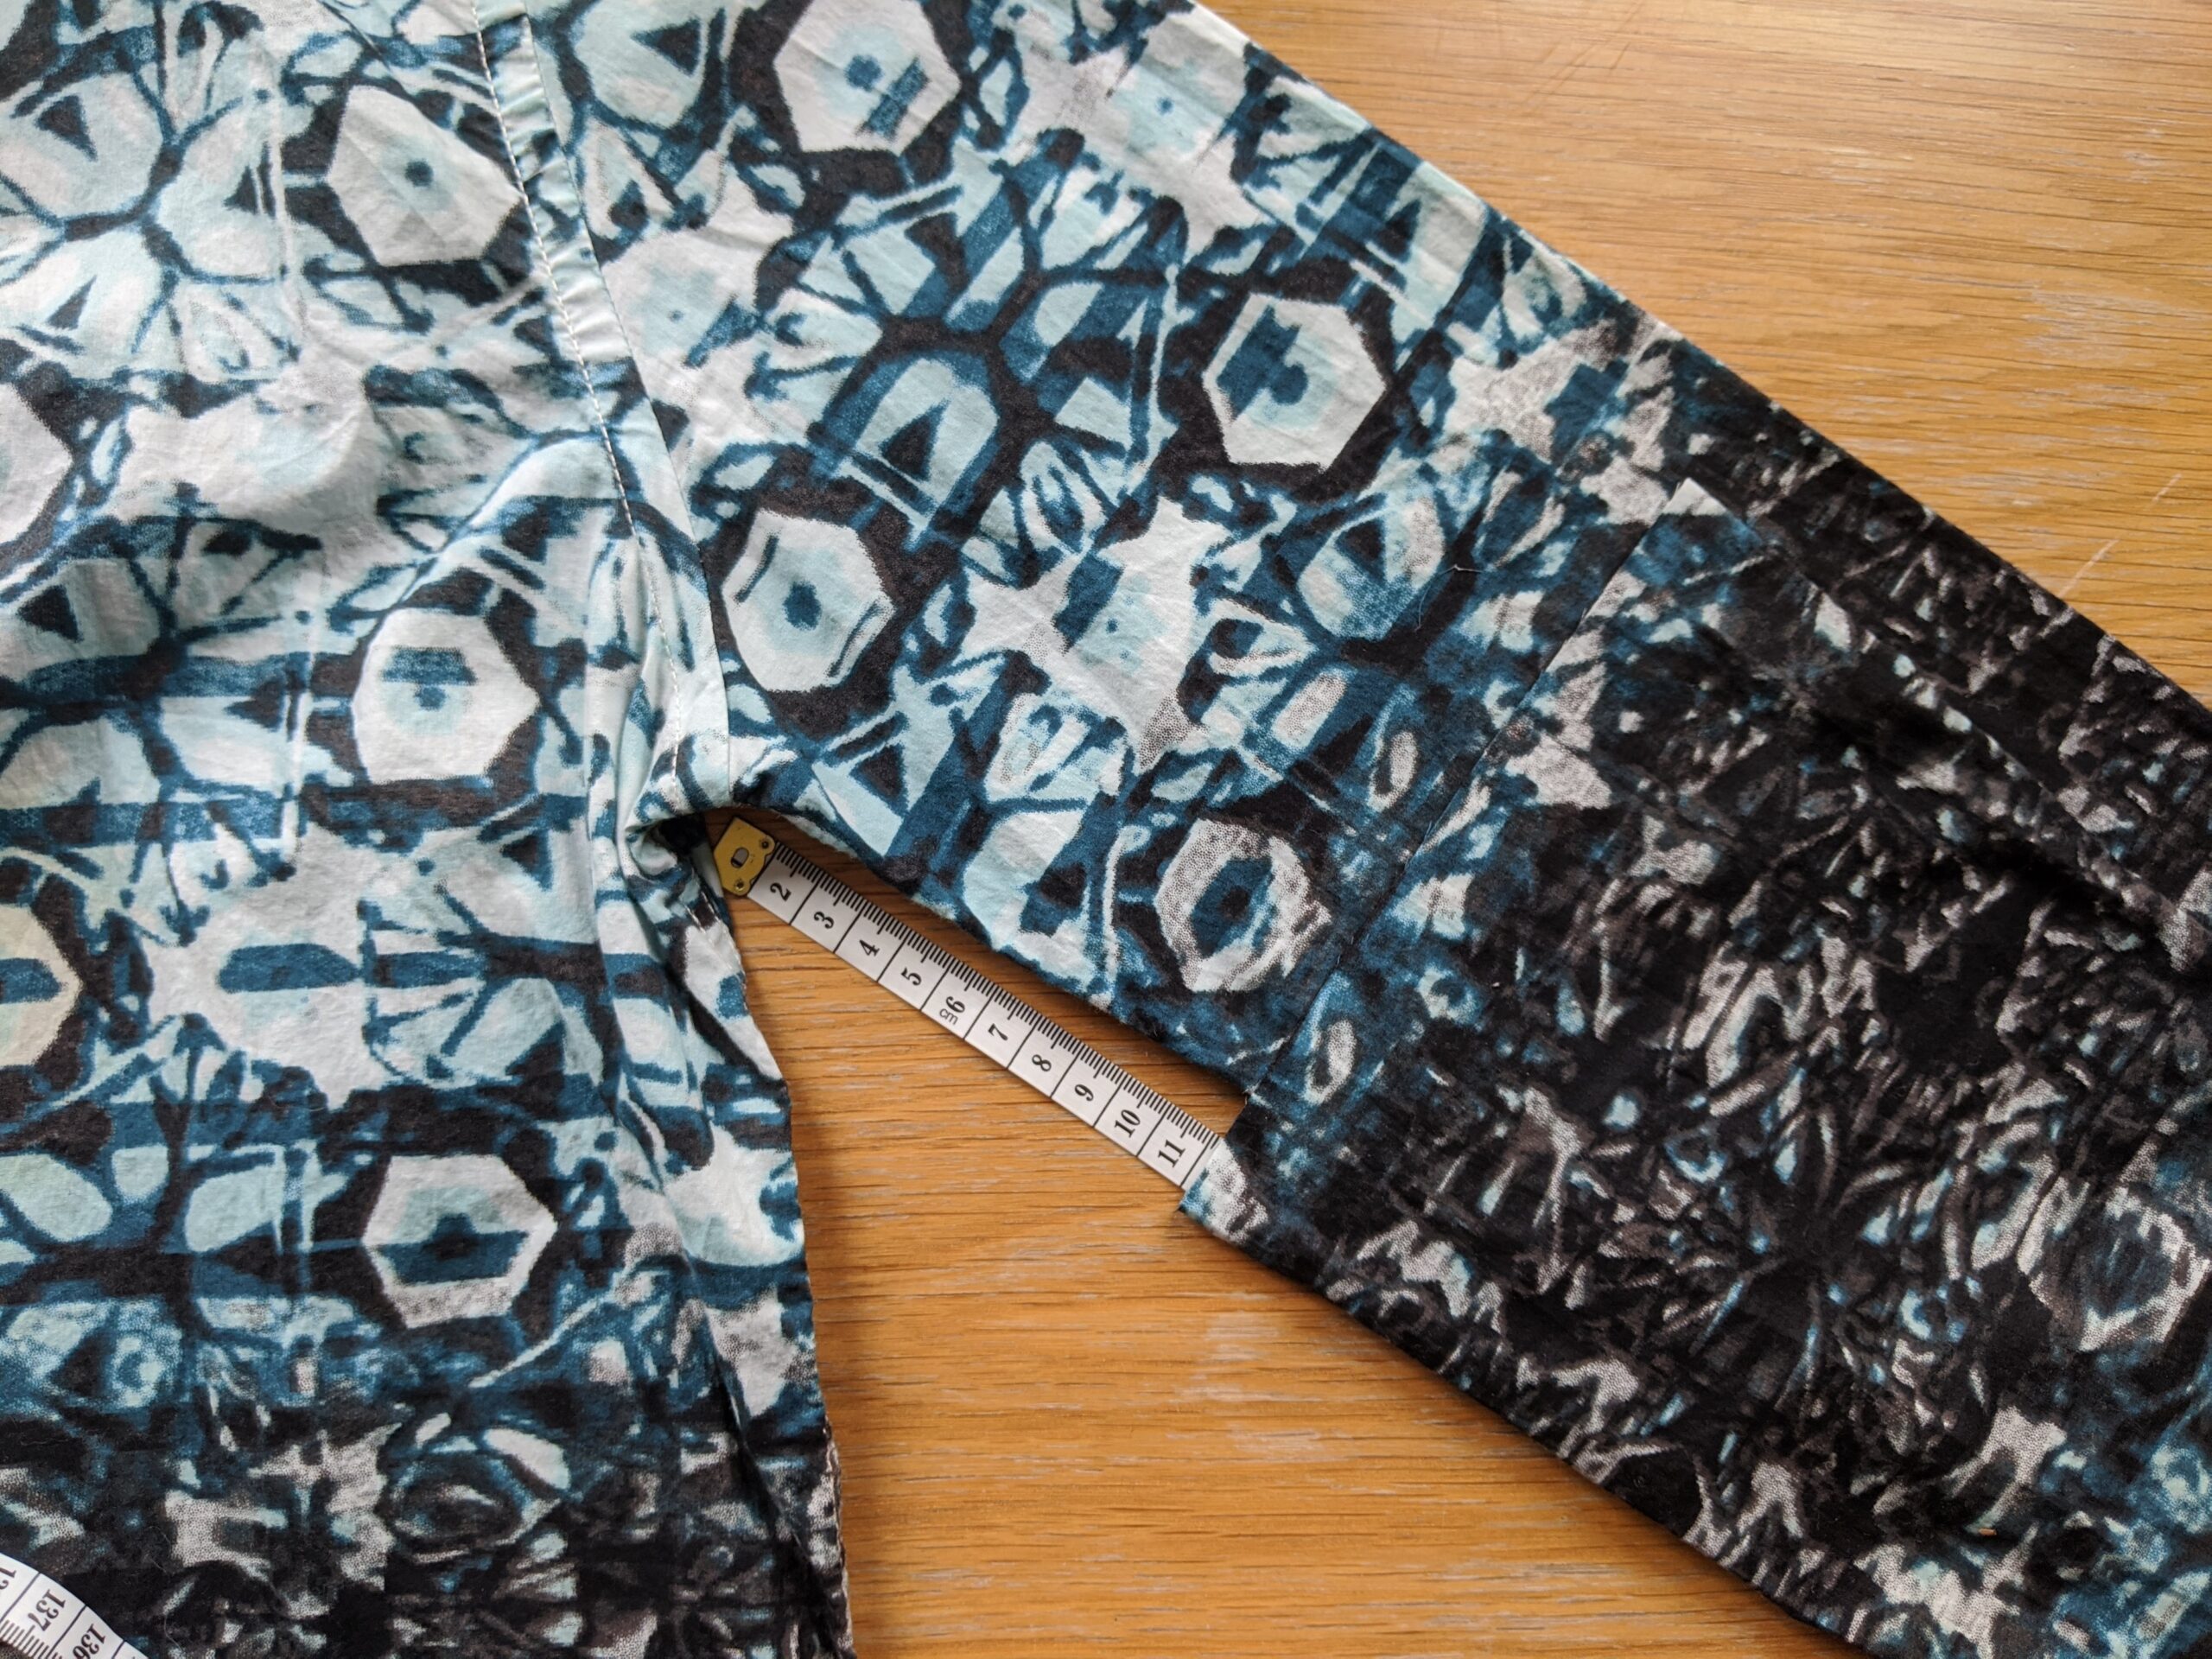
Fold the cut side of the sleeve, ideally twice, inwards (make sure each fold is at least 1cm, or at least enough to get your strap or elastic bands through), and secure using two safety pins at the top and bottom.
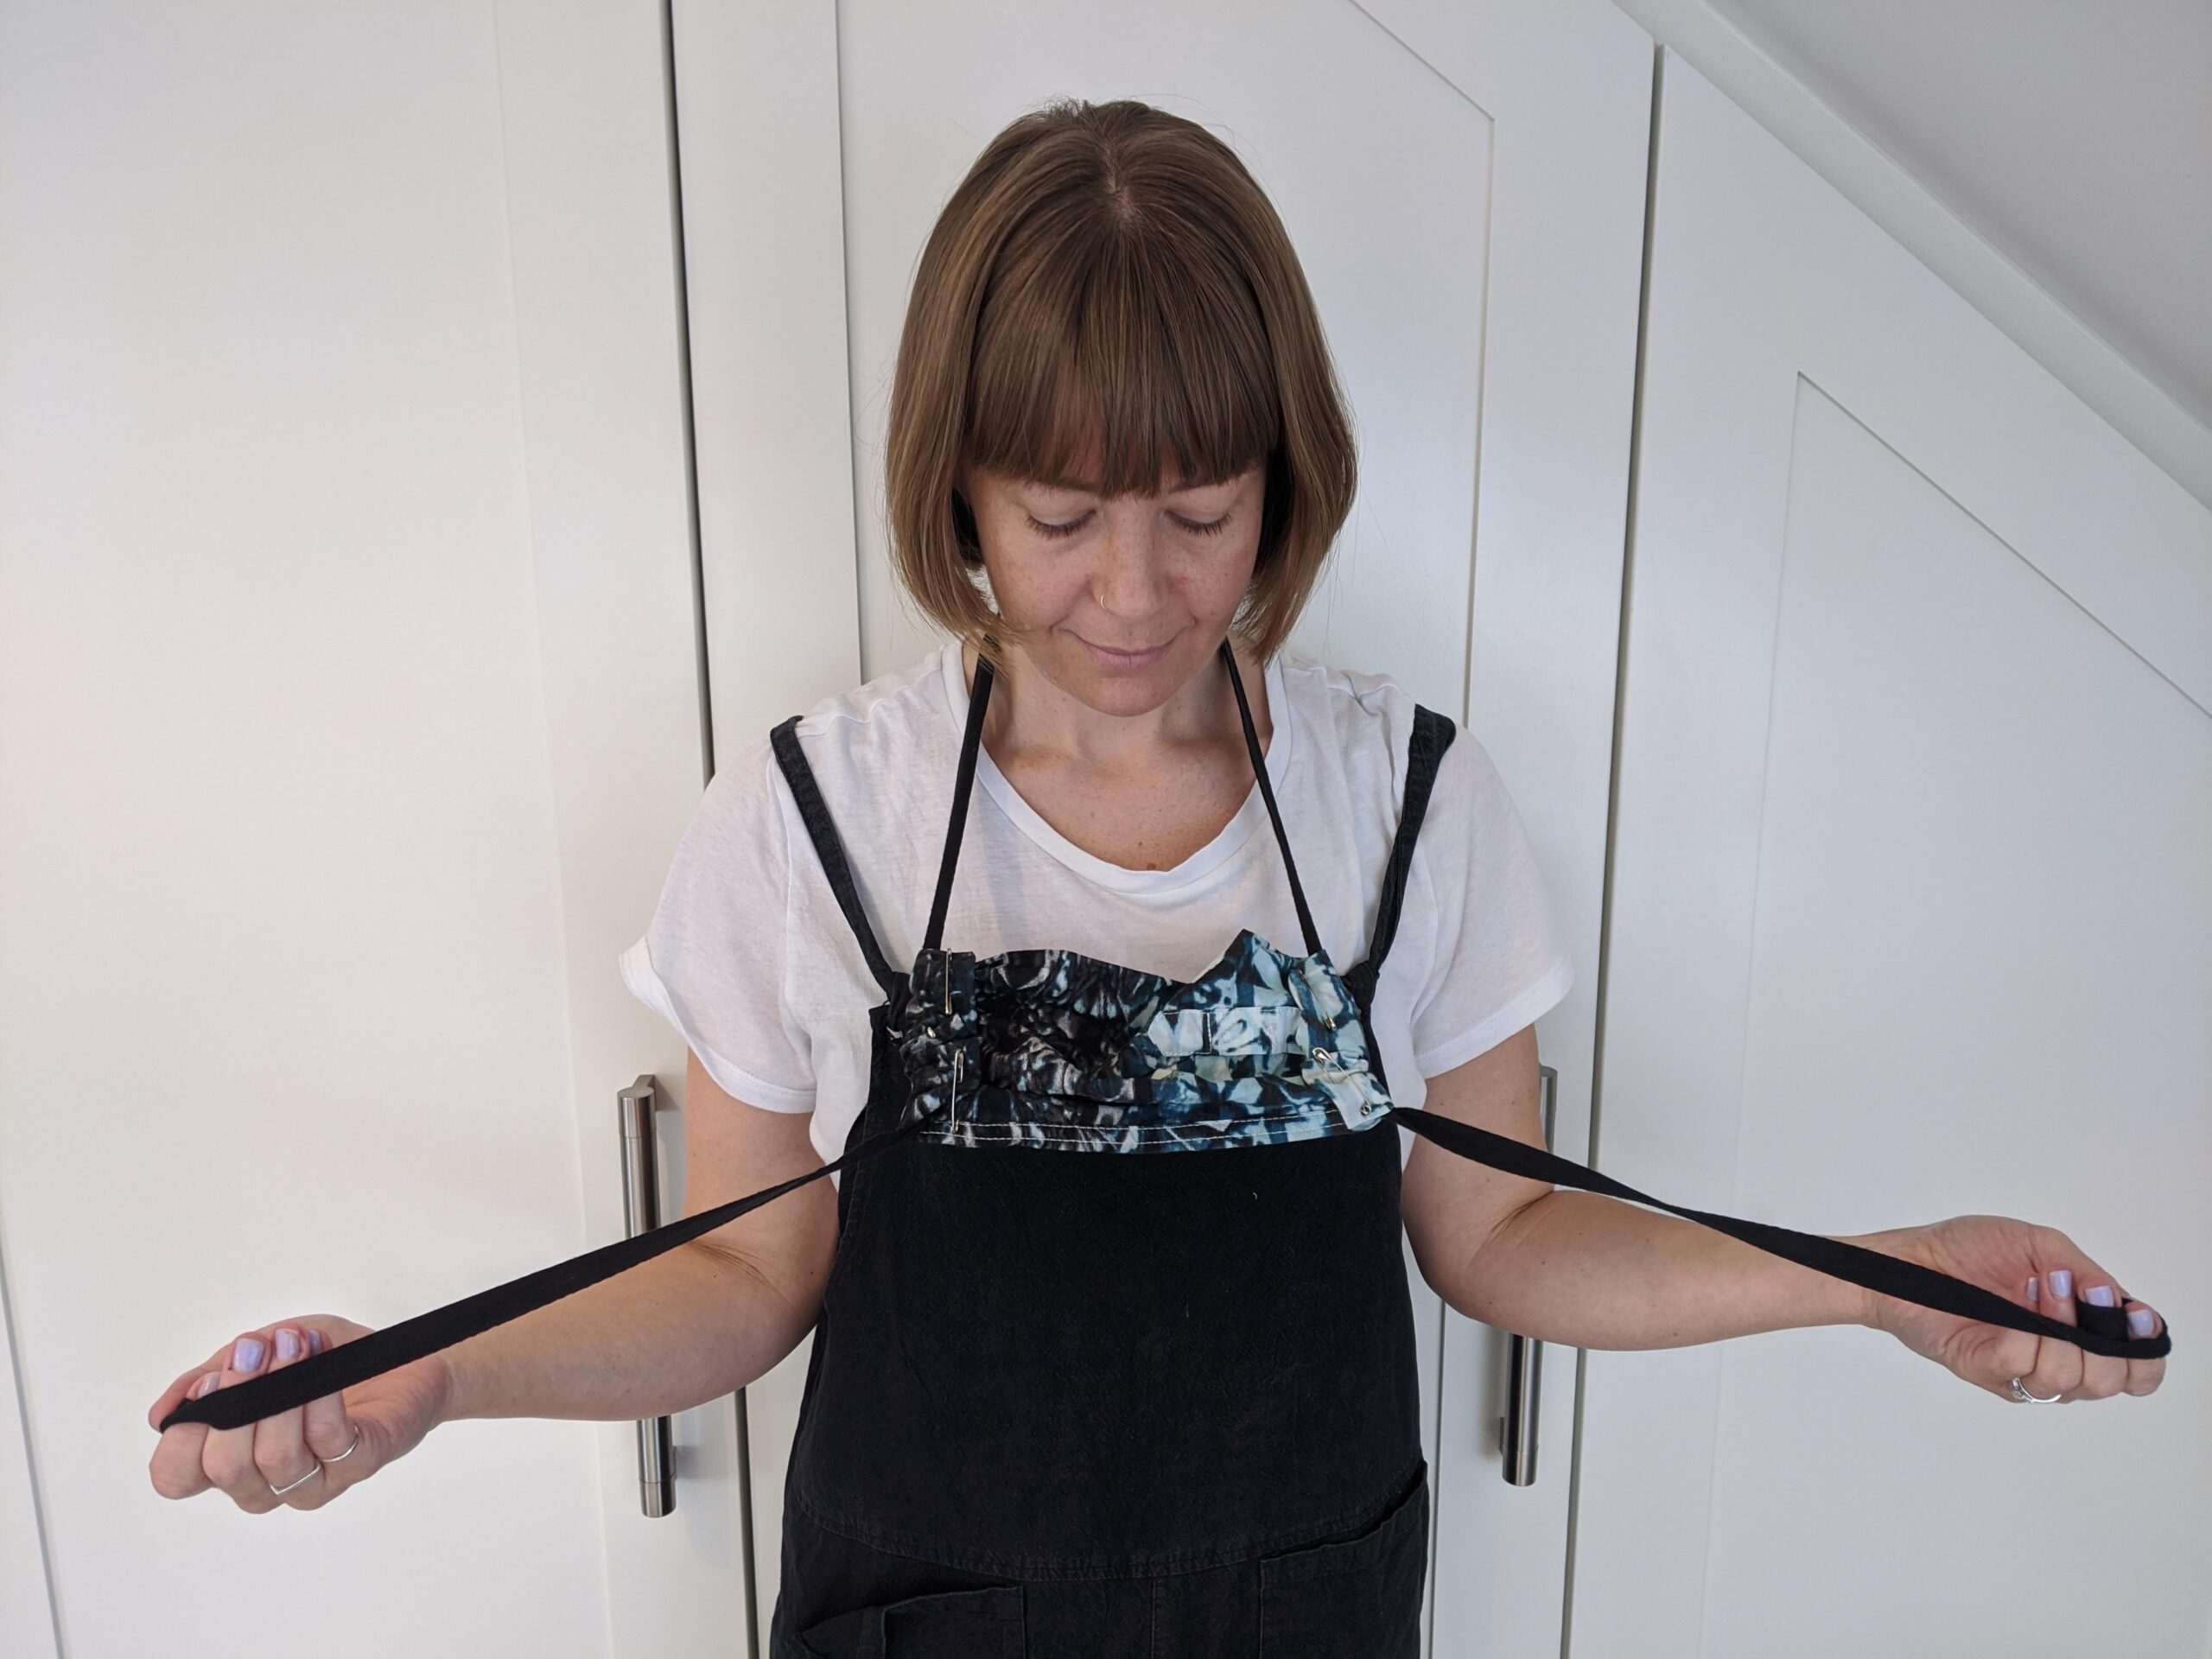
Then, test the mask by putting it on, to see how long it needs to be to cover your face properly. Cut the other end of the sleeve to size and fold twice inwards again.
Note: Facemasks always need to be a bit wider than you’d think, because you need to fold the sides over, ideally twice, to hold the straps. Cut carefully, and remember you can always take more off in a second cut! (And if you’re using a shirtsleeve, you also have the other sleeve as a backup if you make a mistake).
With this shirt, I just cut the cuff off (and removed the second cuff button). Do double check though – I think this shirt had weirdly long sleeves, which is why I wanted to upcycle it.
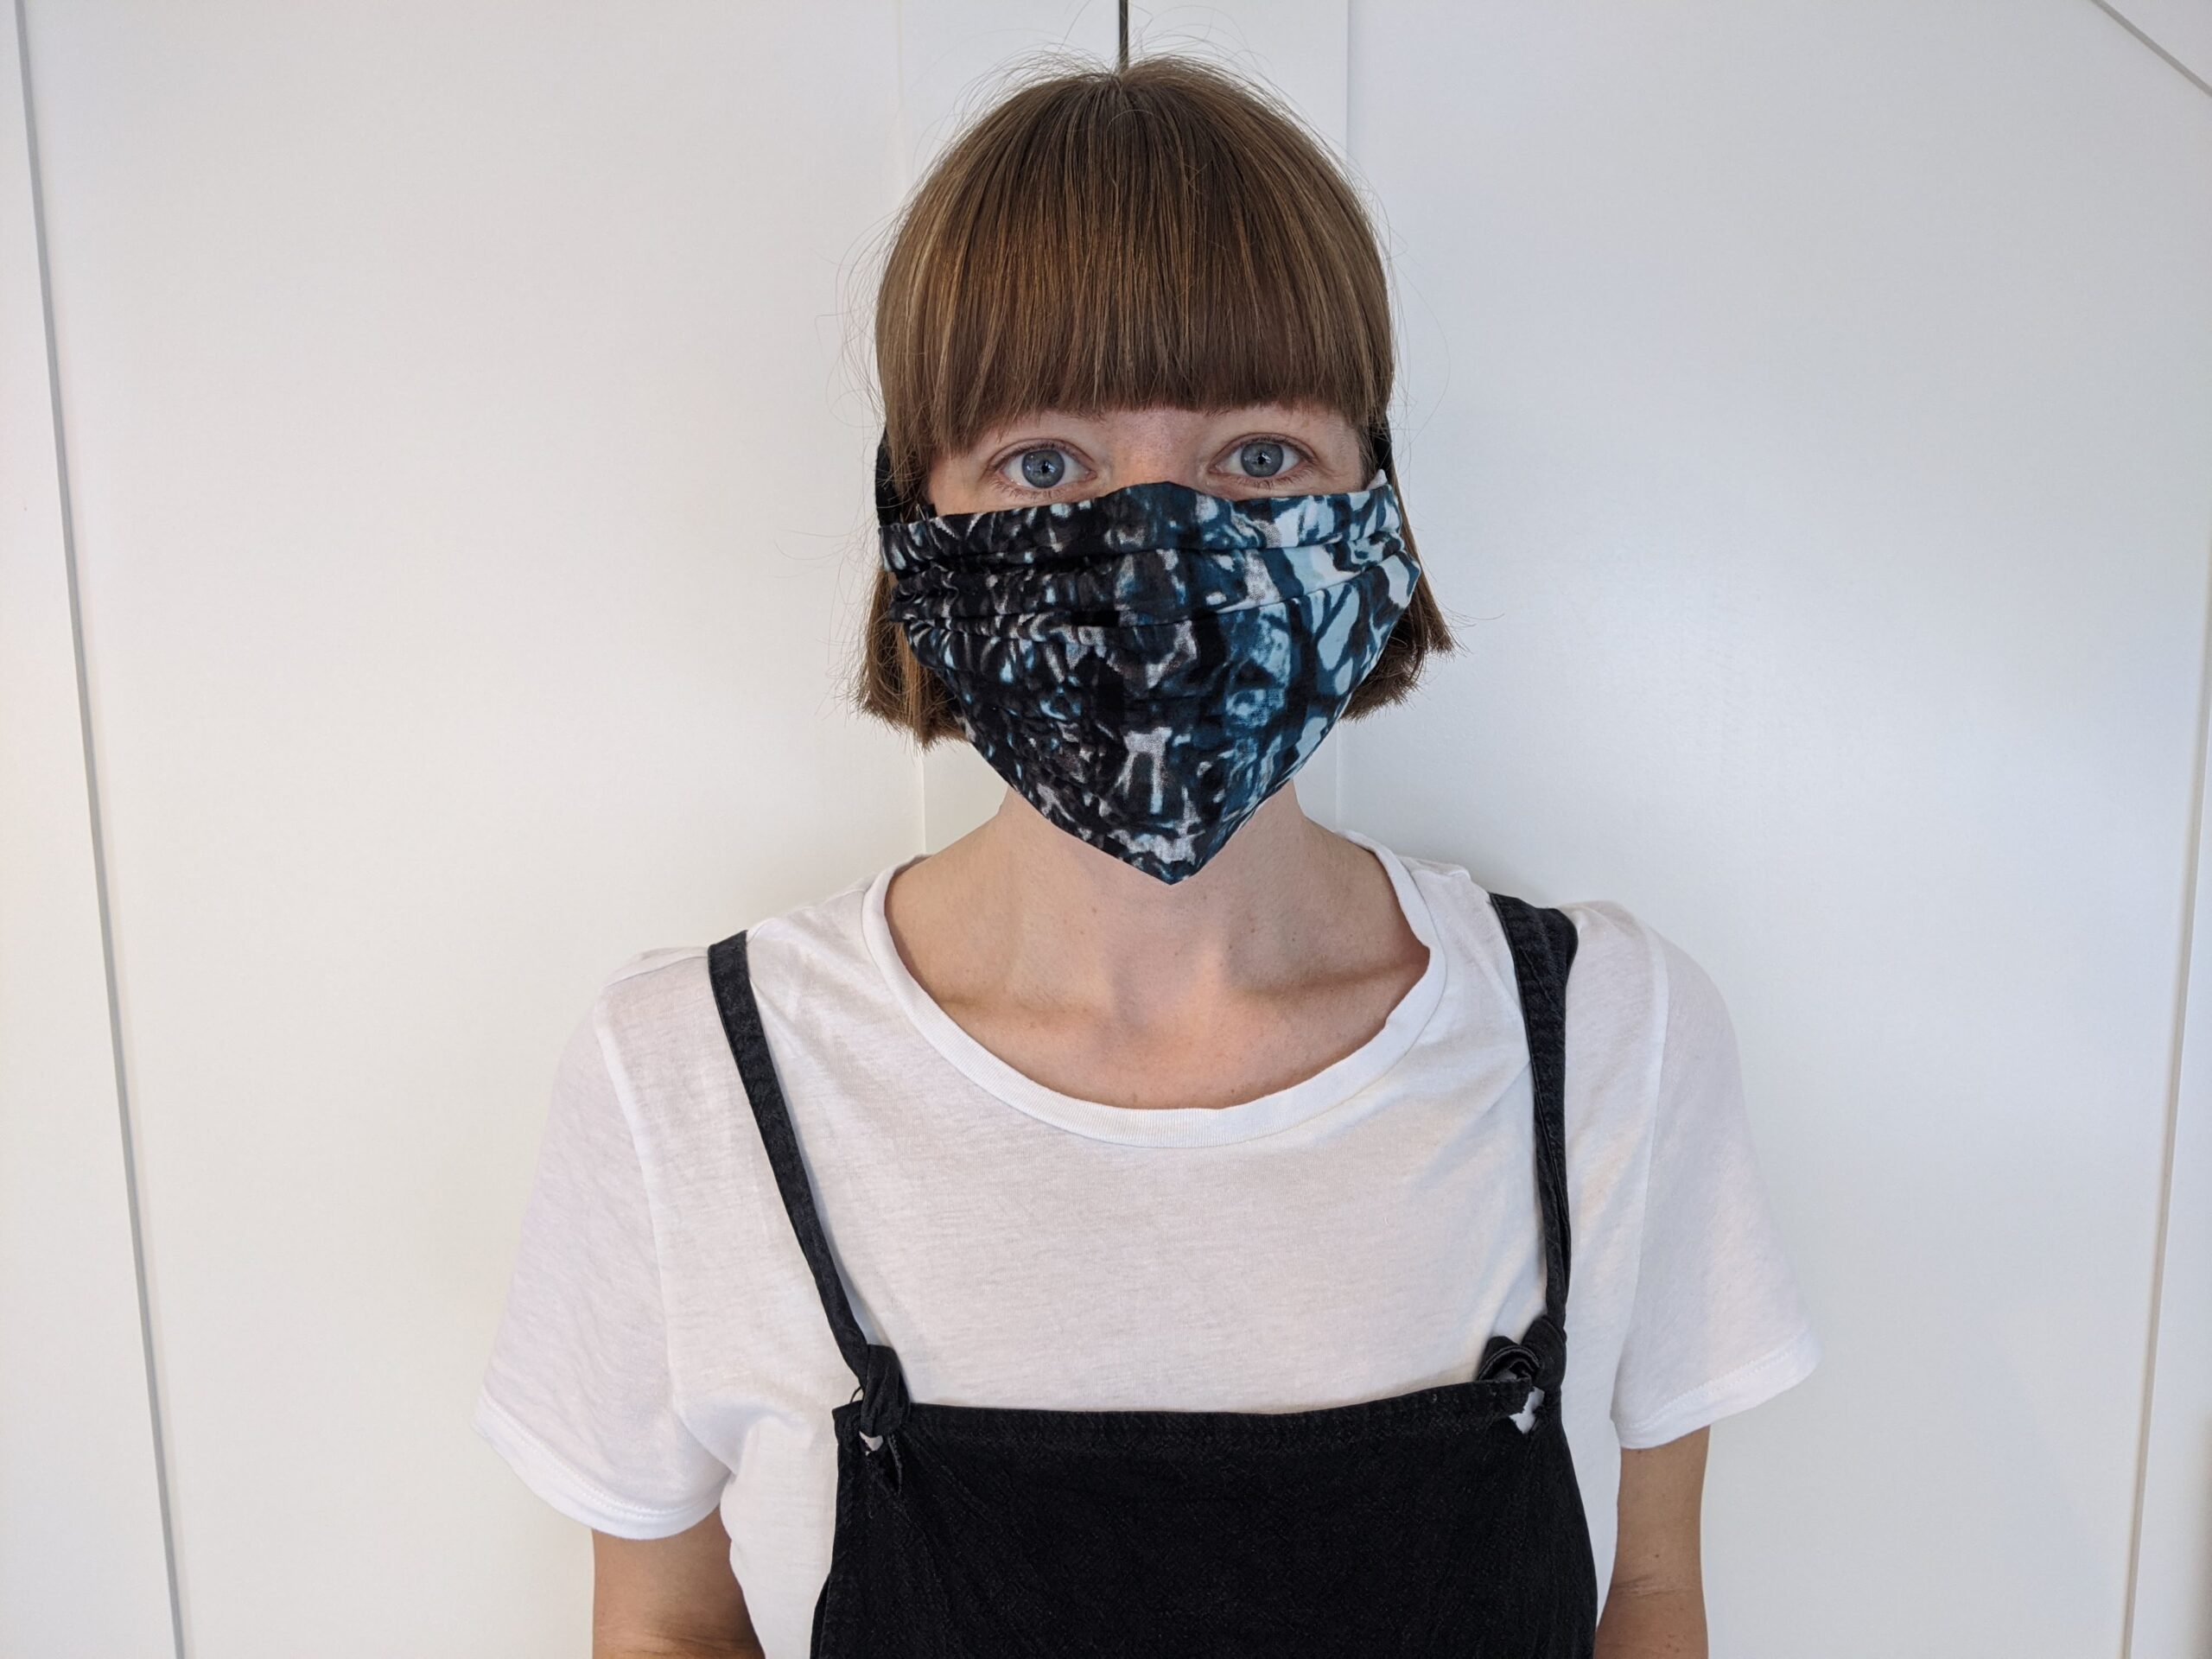
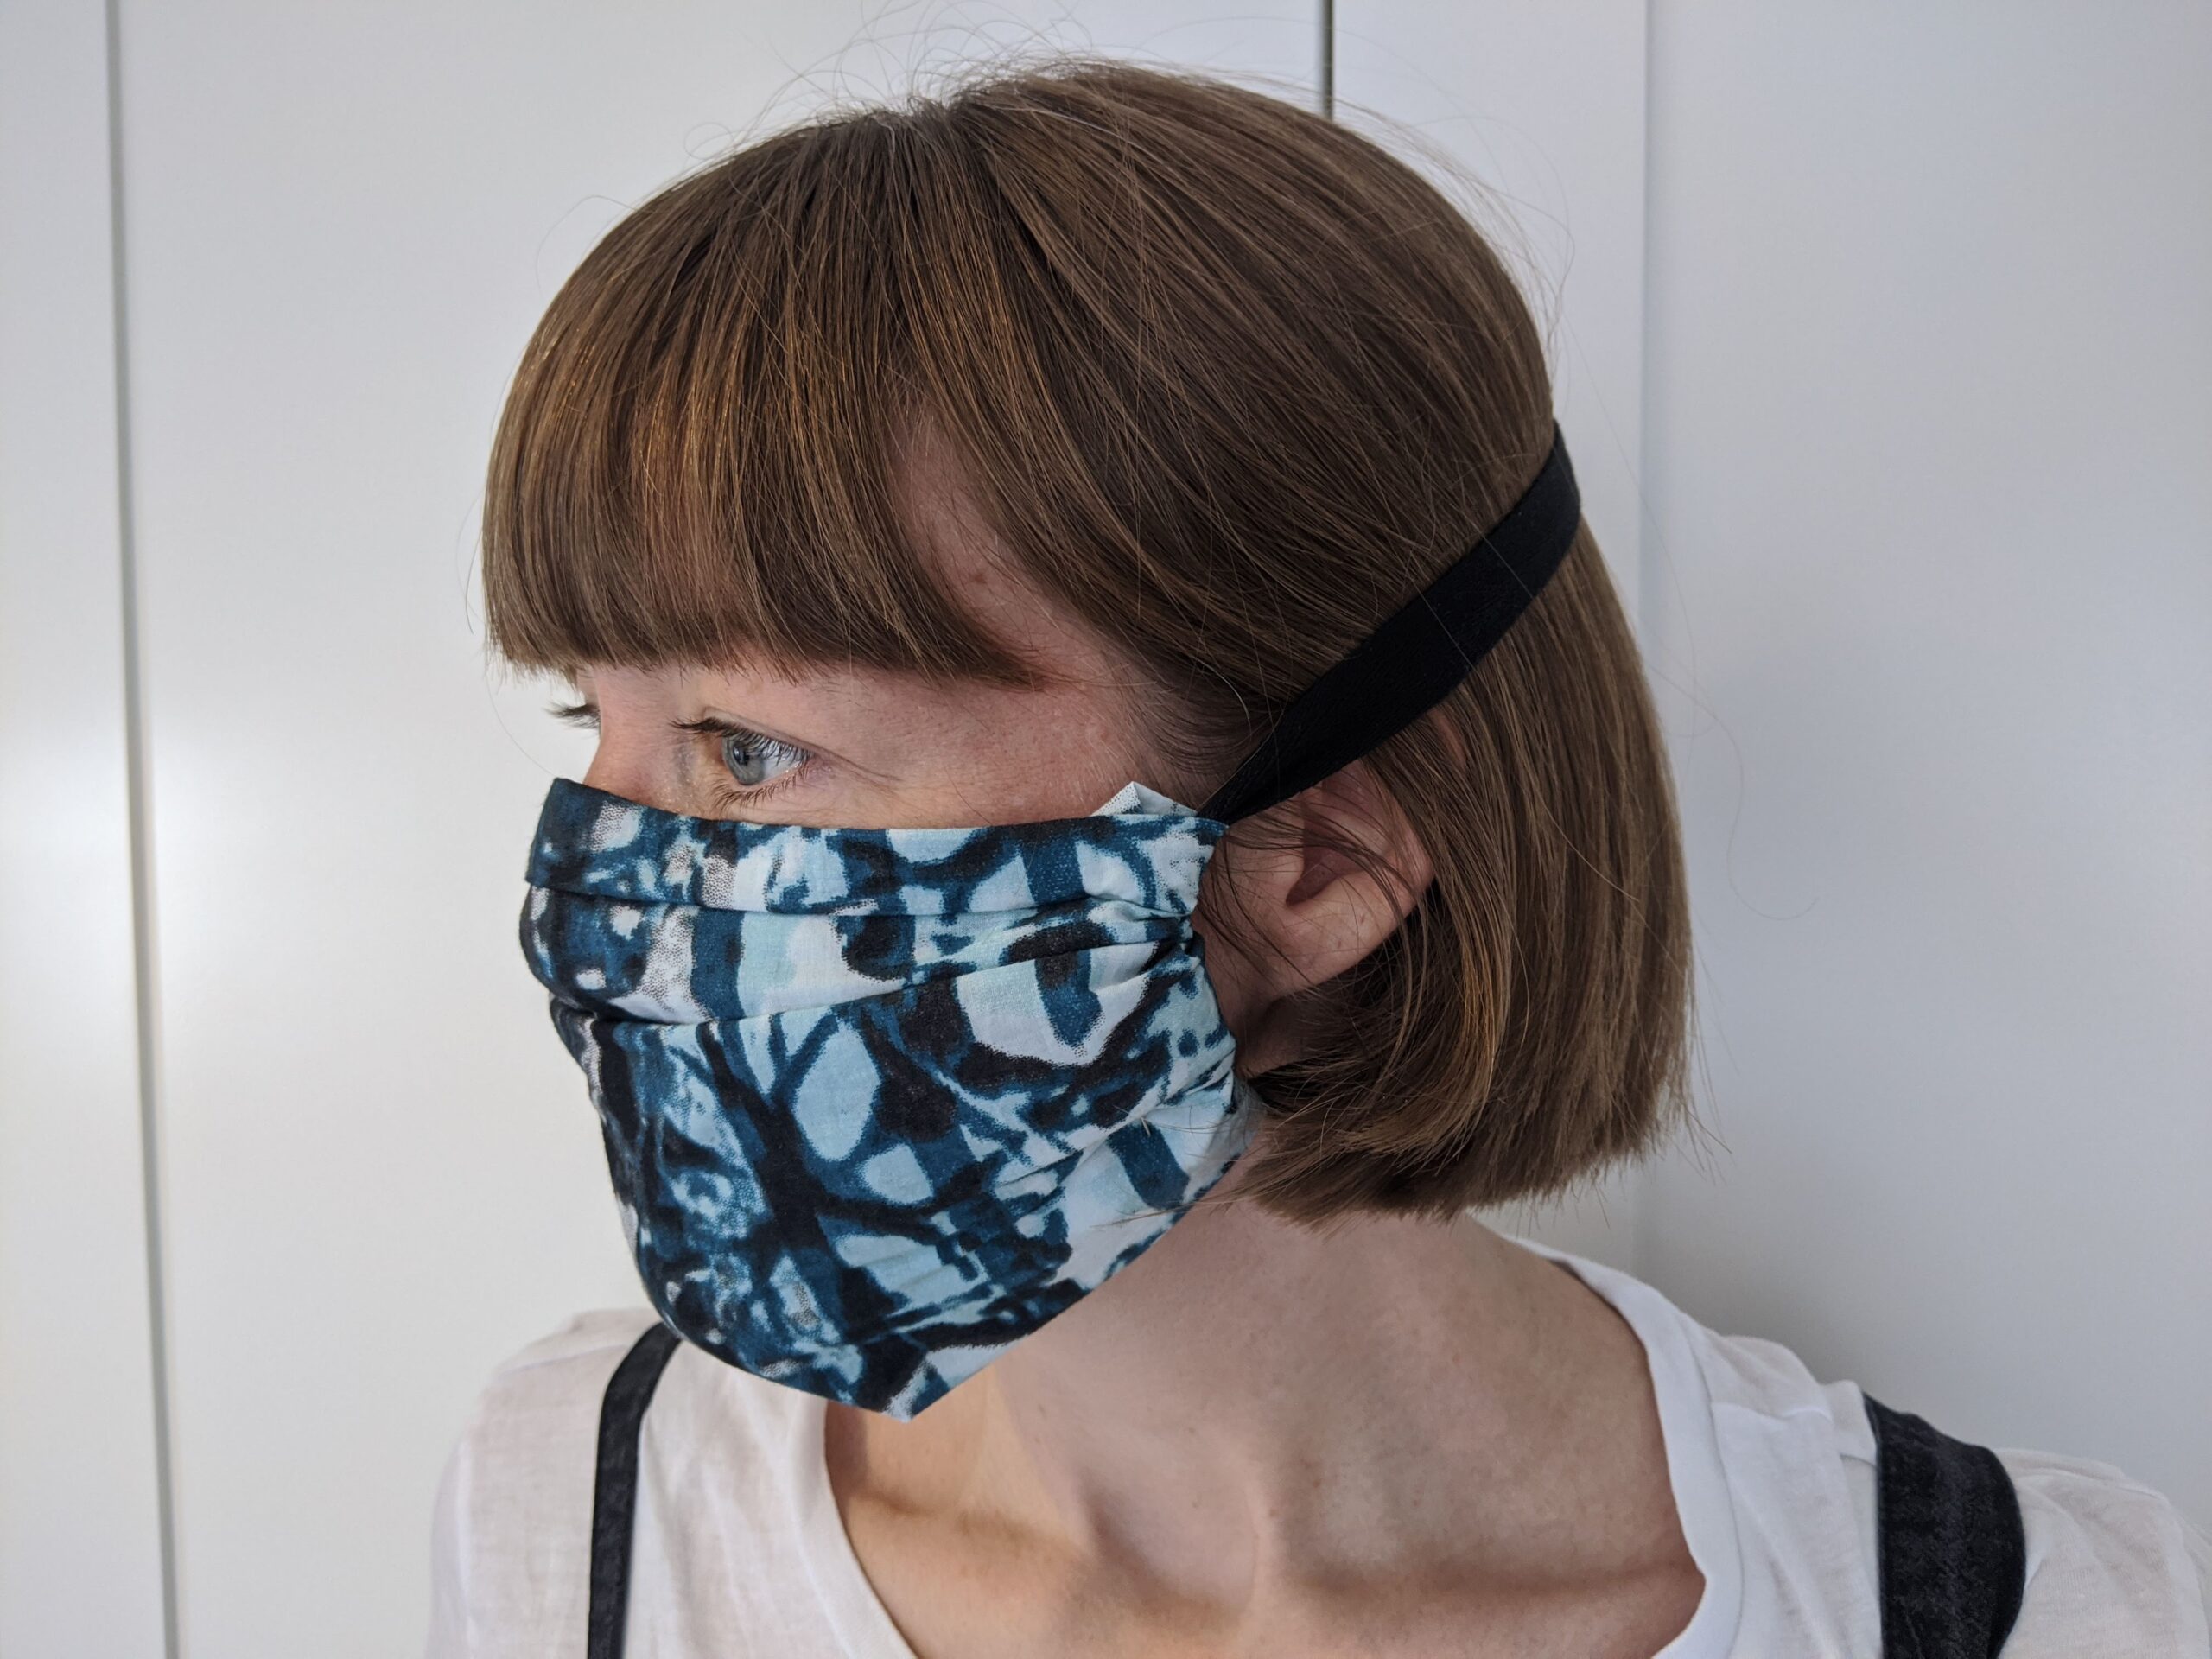
5. Your facemask is ready!
Feeling adventurous? The gallery below will show you how to use the other sleeve to make a more fitted facemask. You’ll need an iron and needle and thread for this one, and safety pins or pins will really help for when you need to sew.
Happy upcycling!